
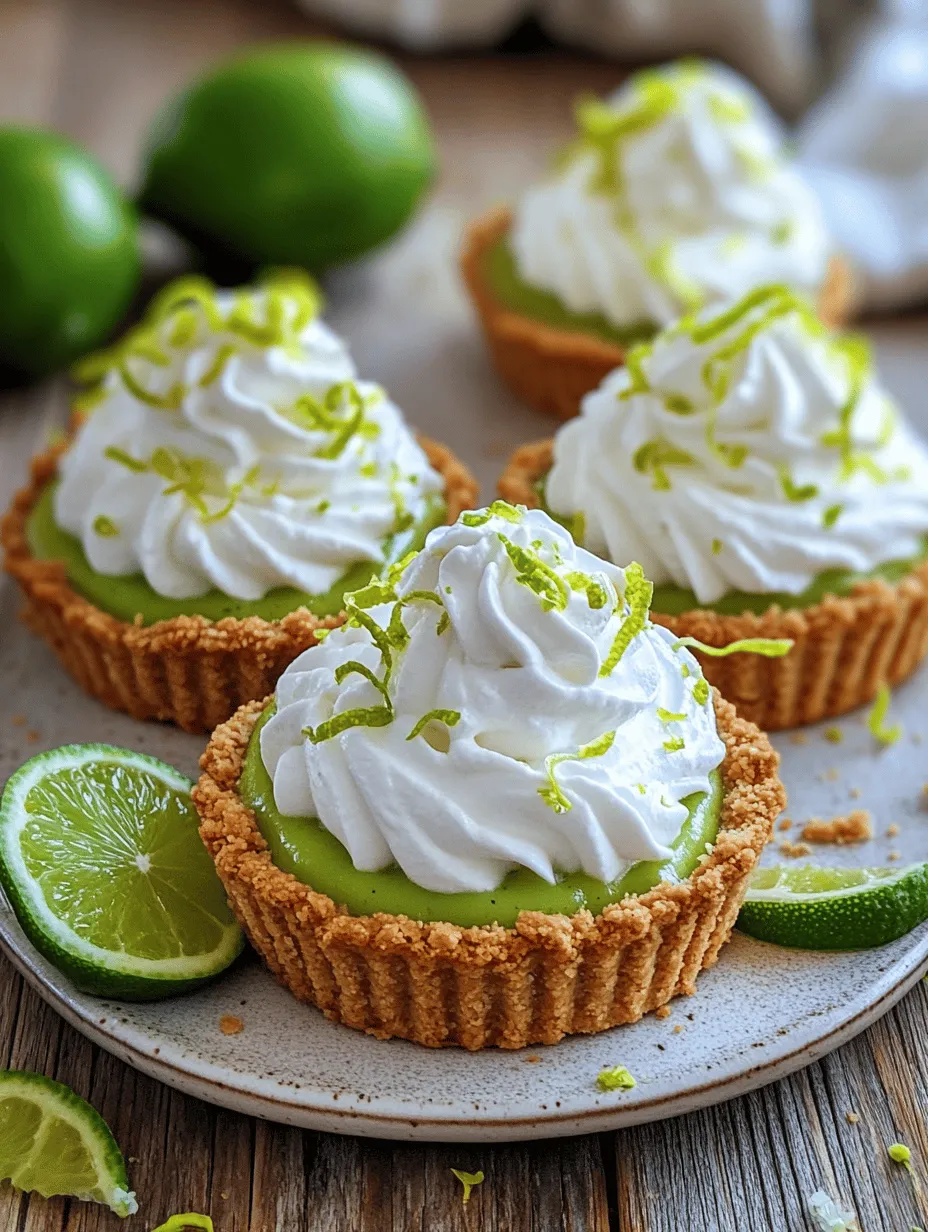
Explore the delightful world of desserts with these Zesty Key Lime Pie Tartlets. This refreshing treat captures the tangy essence of key limes, perfectly balanced with a creamy filling and a buttery graham cracker crust. Ideal for summer gatherings, special occasions, or simply an indulgent weeknight dessert, these tartlets are not only delicious but also easy to make. In this article, we’ll take you through the step-by-step process of creating these delightful treats, discuss the origins of key lime pie, and share tips for perfecting your tartlet-making skills.
Understanding Key Lime Pie
The History and Significance of Key Lime Pie
Originating from the Florida Keys, key lime pie is a staple of American dessert history, boasting a rich cultural significance that extends beyond its delicious taste. The dish is deeply rooted in the culinary traditions of the region where it was first created, dating back to the early 20th century. This sweet and tart dessert is traditionally made with key lime juice, which is derived from the small, round key limes that grow in the Keys. Unlike regular limes, key limes are smaller, with a thinner skin and a more aromatic and tangy flavor profile that sets them apart. Their unique taste is essential to achieving the authentic flavor of this beloved pie.
The true origins of key lime pie are somewhat shrouded in mystery. Some culinary historians suggest that it was first made by the local fishermen who used the readily available key limes to create a dessert for their families. Others believe that it was inspired by recipes brought to the Keys by immigrants, reflecting a fusion of different culinary traditions. Regardless of its exact origins, key lime pie has earned its place in American cuisine and is celebrated for its delectable balance of sweetness and tartness, making it a perennial favorite.
The Appeal of Mini Tartlets
Mini tartlets offer a delightful twist on the traditional key lime pie, bringing with them a multitude of benefits that make them particularly appealing. One of the most significant advantages of these individual-sized treats is portion control. In a world where indulgence is often accompanied by guilt, these tartlets allow you to enjoy a delicious dessert while keeping your serving sizes in check. They are perfect for those who want to savor a sweet bite without overindulging.
Additionally, mini tartlets are incredibly versatile and present beautifully for gatherings. Whether you are hosting a summer barbecue, a birthday party, or a holiday celebration, these tartlets provide an elegant and eye-catching dessert option. Their individual servings make them easy to share and serve, eliminating the need for slicing and the mess that often accompanies larger pies. You can even customize each tartlet with different toppings, allowing your guests to choose their favorite flavors or create their own unique combinations.
Lastly, the versatility of tartlets means that they can be adapted for various occasions. While the zesty key lime version is perfect for summer, you can easily swap out the filling and create different variations for other seasons or celebrations. From chocolate ganache to fresh fruit compotes, the possibilities for mini tartlets are endless.
Ingredient Breakdown
To create these delightful Zesty Key Lime Pie Tartlets, you’ll need to gather a few essential ingredients that come together to form the crust, filling, and topping. Let’s dive into the specific components that make this dessert a true standout.
The Essential Components of the Crust
Graham Cracker Crumbs: The base of our tartlets is a buttery graham cracker crust, which provides a perfect balance of sweetness and crunch. Graham crackers are a classic choice for pie and tart crusts due to their slightly sweet flavor and crumbly texture. They are readily available and easy to work with, making them a go-to for home bakers.
The Role of Sugar and Butter: Sugar enhances the sweetness of the crust, while butter provides richness and helps bind the crumbs together. The melted butter coats the graham cracker crumbs, allowing them to adhere and form a solid crust when pressed into the tartlet pans. This combination creates a delectable foundation for the zesty filling that will follow.
Importance of Salt: While it may seem counterintuitive to add salt to a sweet crust, a pinch of salt is essential in balancing the flavors. It enhances the sweetness of the sugar and the richness of the butter, resulting in a well-rounded crust that complements the tart filling.
The Filling: A Tangy Delight
Fresh Key Lime Juice: The star of our tartlets is undoubtedly the fresh key lime juice. This juice brings a bright, tangy flavor that is indispensable in capturing the essence of traditional key lime pie. When selecting key limes, look for those that are slightly yellow and feel heavy for their size, as these will be the juiciest and most flavorful. If key limes are not available, regular limes can be used, but the flavor will differ slightly.
The Role of Sweetened Condensed Milk: Sweetened condensed milk is a crucial ingredient that adds richness and creaminess to the filling. Its thick texture helps to create a luscious filling that sets beautifully when baked. The combination of the sweetened condensed milk with the tartness of the key lime juice creates a delightful contrast that is a hallmark of key lime pie.
Why Egg Yolks Are Essential: Egg yolks play a pivotal role in providing structure and creaminess to the filling. They help to emulsify the mixture, resulting in a smooth and creamy texture that is both satisfying and indulgent. Baking the tartlets allows the egg yolks to set, creating a delightful custard-like filling that perfectly contrasts with the crunchy crust.
The Subtle Touch of Vanilla Extract: A hint of vanilla extract adds depth to the filling, enhancing the overall flavor profile. It rounds out the tartness of the key lime and complements the sweetness of the sweetened condensed milk, resulting in a filling that is incredibly flavorful yet balanced.
Topping It Off: Whipped Cream
No key lime tartlet is complete without a generous dollop of whipped cream.
The Significance of Heavy Whipping Cream: Heavy whipping cream is the ideal choice for making whipped cream due to its higher fat content, which allows for a rich and stable texture. When whipped, it transforms into a light and airy topping that adds a delightful creaminess to each tartlet.
How Powdered Sugar Enhances Sweetness: Powdered sugar is often used in whipped cream to sweeten it without creating a grainy texture. Its fine consistency allows for easy incorporation, ensuring that the whipped cream remains smooth and fluffy. Additionally, the use of powdered sugar results in a subtle sweetness that complements the tangy filling rather than overpowering it.
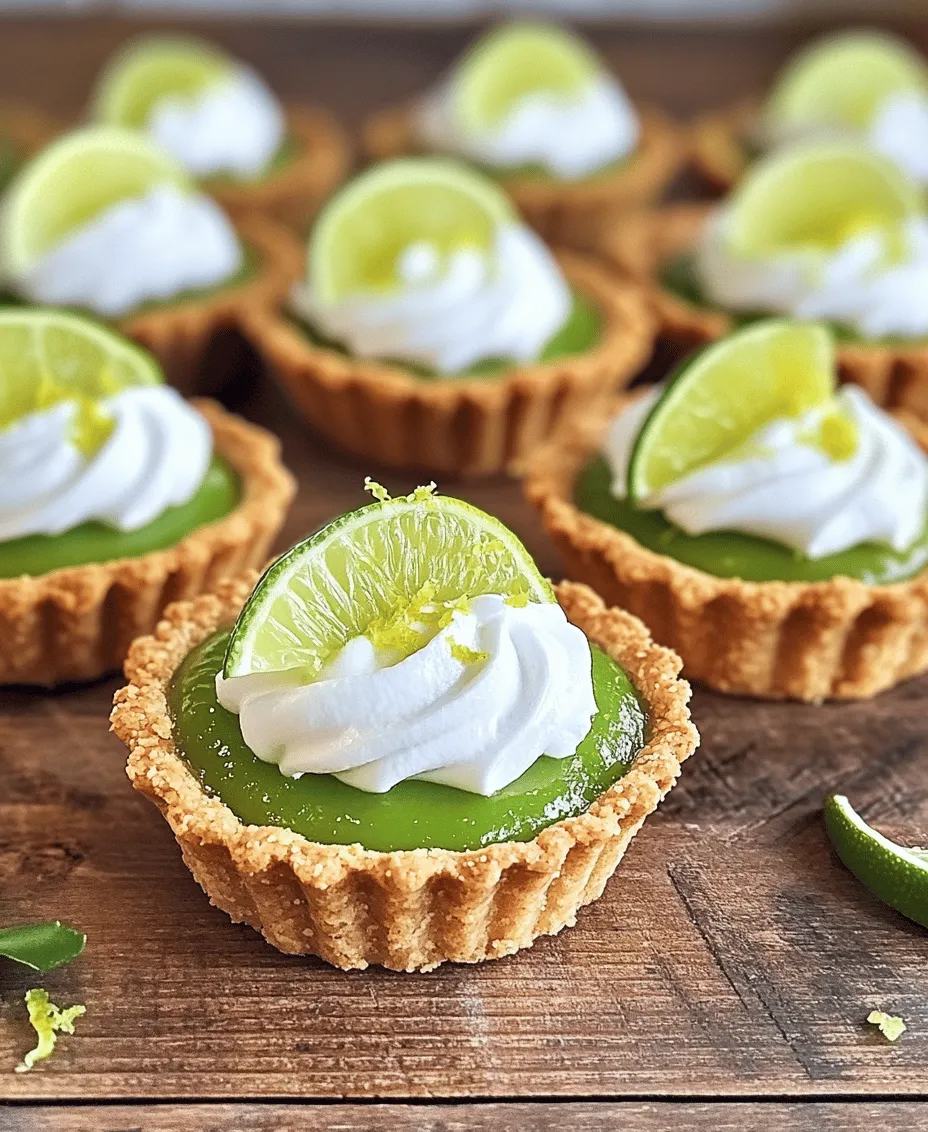
Optional Garnishes: For visual appeal, consider garnishing your tartlets with lime zest or slices. The bright green zest adds a pop of color, while thin slices of key lime can serve as an attractive and flavorful decoration. These garnishes not only enhance the appearance of your tartlets but also reinforce the key lime flavor profile.
Step-by-Step Instructions
Before embarking on the journey to create these Zesty Key Lime Pie Tartlets, it’s important to prep your kitchen and gather all necessary ingredients. Here’s a detailed guide on how to set yourself up for success in the kitchen.
Prepping Your Kitchen:
1. Gather Your Ingredients: Ensure you have all the ingredients on hand, including graham cracker crumbs, sugar, butter, salt, fresh key lime juice, sweetened condensed milk, egg yolks, and heavy whipping cream.
2. Prepare Your Equipment: You’ll need mini tartlet pans or a muffin tin, mixing bowls, a whisk, a rubber spatula, and an electric mixer for whipping the cream. Having all your equipment ready will streamline the process and make it easier to create these delightful treats.
3. Preheat the Oven: Set your oven to 350°F (175°C) so it’s preheated and ready for baking the tartlet crusts. This step is crucial for ensuring an even bake.
4. Crust Preparation: In a mixing bowl, combine graham cracker crumbs, sugar, melted butter, and a pinch of salt. Mix until the crumbs are well coated and resemble wet sand.
5. Form the Crust: Press the crumb mixture firmly into the bottom and up the sides of each tartlet pan. This will form the base for your zesty filling. Ensure the crust is evenly distributed to avoid uneven baking.
With your kitchen prepped and the crust ready, you’re all set to create the zesty filling and complete the tartlets. Stay tuned for the next part, where we’ll guide you through the filling process and the final assembly of these delightful desserts.
Essential Tools and Equipment Needed
Before diving into the creation of your Zesty Key Lime Pie Tartlets, it’s essential to gather the right tools and equipment. Having everything at hand will streamline the cooking process and ensure you don’t miss any critical steps. Here are the essentials:
– Mixing Bowls: A medium bowl for the crust and a medium bowl for the filling.
– Electric Mixer or Whisk: For whipping the cream and combining ingredients efficiently.
– Tartlet Pan: A non-stick tartlet pan with individual compartments is ideal for even cooking and easy removal.
– Juicer or Reamer: To extract juice from key limes effectively.
– Measuring Cups and Spoons: For accurate ingredient measurements.
– Rubber Spatula: For folding ingredients and scraping down bowls.
– Baking Sheet: To place your tartlet pan on while baking for stability.
– Piping Bag with Star Tip: For decorating the whipped cream topping elegantly.
Tips for Ensuring a Smooth Cooking Process
1. Mise en Place: Before starting, measure out all your ingredients and have them ready to go. This preparation will help you follow the recipe smoothly and avoid any last-minute scrambling.
2. Room Temperature Ingredients: If a recipe calls for ingredients like eggs or cream cheese, ensure they are at room temperature. This will help them blend more seamlessly and create a smoother filling.
3. Preheat the Oven: Always preheat your oven before baking to guarantee even cooking. Set it to the required temperature before starting the crust so that it’s ready when you need it.
4. Clean Workspace: Keep your workspace tidy while you cook. This will make it easier to focus on the recipe and ensure you don’t misplace any tools.
Creating the Perfect Crust
Detailed Instructions for Mixing and Pressing the Crust
1. Combine Ingredients: In a medium mixing bowl, combine 1 cup of graham cracker crumbs with 1/4 cup of granulated sugar and 1/2 cup of melted unsalted butter.
2. Mix Until Crumbly: Use a fork or your fingers to mix until the mixture resembles wet sand. Ensure all crumbs are well-coated with butter.
3. Press into Pan: Firmly press the crust mixture into the bottom and up the sides of the tartlet pan. Use the bottom of a measuring cup to create an even layer.
4. Chill the Crust: Place the crust in the refrigerator for at least 30 minutes to set. Chilling helps it hold its shape while baking.
Baking Tips to Achieve the Ideal Golden Color and Texture
1. Preheat the Oven: Set your oven to 350°F (175°C) while the crust is chilling. This temperature is perfect for achieving a golden-brown crust without burning.
2. Bake: Once chilled, bake the crust for 8-10 minutes until lightly golden. Watch closely to avoid overbaking, as the crust can turn from golden to burnt quickly.
3. Cool Completely: After baking, allow the crust to cool completely in the pan on a wire rack before adding the filling.
Crafting the Zesty Filling
Tips for Juicing Key Limes Effectively
1. Roll Before Juicing: Before cutting the limes, roll them on the countertop with your palm to loosen the juice inside.
2. Use a Juicer: A hand-held juicer or reamer will help extract the maximum amount of juice from the limes. Strain the juice through a fine-mesh sieve to catch any seeds.
Achieving the Correct Consistency for the Filling
1. Combine Ingredients: In a mixing bowl, whisk together 2 large eggs, 1 can (14 ounces) of sweetened condensed milk, and the freshly squeezed juice of 4-5 key limes.
2. Whisk Until Smooth: Ensure all ingredients are combined smoothly, with no lumps. The filling should be creamy and pourable.
3. Taste and Adjust: Give the filling a taste and adjust the lime juice if you prefer a more pronounced tartness.
Baking the Tartlets
Ideal Baking Times and Temperatures for the Best Results
1. Preheat: As previously mentioned, preheat your oven to 350°F (175°C).
2. Fill the Crusts: Pour the key lime filling into the cooled crusts, filling them about 3/4 full to allow for any bubbling during baking.
3. Bake: Bake the tartlets for 10-15 minutes. The filling should be set but still slightly jiggly in the center.
Signs to Look for to Determine Doneness
1. Slight Firmness: The filling should be firm around the edges and wobbly in the center. It will continue to firm up as it cools.
2. Light Browning: Look for a slight browning on the edges of the filling, indicating that the sugar has caramelized slightly.
Whipping Cream to Perfection
Techniques for Achieving Soft Peaks Without Overwhipping
1. Chill Your Tools: For the best results, chill your mixing bowl and beaters in the refrigerator for about 15 minutes prior to whipping the cream.
2. Start Slow: Pour 1 cup of heavy whipping cream into the cold bowl. Begin whipping on a low speed, gradually increasing to medium-high as soft peaks begin to form.
3. Add Sugar: Once soft peaks form, add 2 tablespoons of powdered sugar and a splash of vanilla extract. Continue whipping until stiff peaks form, but be careful not to overwhip, as this can lead to a grainy texture.
Assembling Your Tartlets
Step-by-Step Guide on Topping the Tartlets
1. Cool the Tartlets: Allow the baked tartlets to cool completely before adding the whipped cream topping.
2. Pipe the Cream: Using a piping bag fitted with a star tip, pipe the whipped cream onto each tartlet in a circular motion for a decorative look.
Presentation Tips for an Elegant Finish
1. Garnish: Add a slice of lime or a sprinkle of lime zest on top of the whipped cream for a pop of color and an extra zesty kick.
2. Serve on a Platter: Arrange the tartlets on a decorative platter to create an appealing presentation. Fresh mint leaves can also be added for a vibrant touch.
Serving Suggestions
Pairing Ideas for Your Tartlets
1. Recommended Beverages: Pair your Zesty Key Lime Pie Tartlets with refreshing beverages like iced tea, lemonade, or a light white wine such as Sauvignon Blanc to complement the tartness.
2. Suggestions for Serving on Different Occasions: These tartlets are perfect for summer barbecues, birthday parties, or as a light dessert after a rich meal. They are a delightful treat for any occasion.
3. How to Store and Serve Leftovers: Store any leftover tartlets in an airtight container in the refrigerator for up to three days. Serve chilled for the best taste.
Nutritional Information
Overview of Nutritional Benefits
1. Key Ingredients and Their Health Benefits: Key limes are packed with vitamin C, which boosts the immune system and promotes healthy skin. The graham crackers provide complex carbohydrates, while the whipped cream adds a rich flavor without too many calories if portioned correctly.
2. Caloric Breakdown per Serving and Portion Considerations: Each tartlet contains approximately 200-250 calories, depending on the size of the servings and the amount of cream used. Adjust portion sizes according to dietary needs.
Conclusion
Zesty Key Lime Pie Tartlets are not just a dessert; they are a celebration of flavor and creativity in the kitchen. With their vibrant color and refreshing taste, they serve as a perfect ending to any meal or a delightful treat to share with friends and family. By following the outlined steps and understanding the ingredients, anyone can master this delectable dessert. Whether you are a seasoned baker or a novice in the kitchen, these tartlets are sure to impress and satisfy your sweet cravings. Enjoy the process of crafting these delightful bites and savor every zesty morsel!