
Introduction
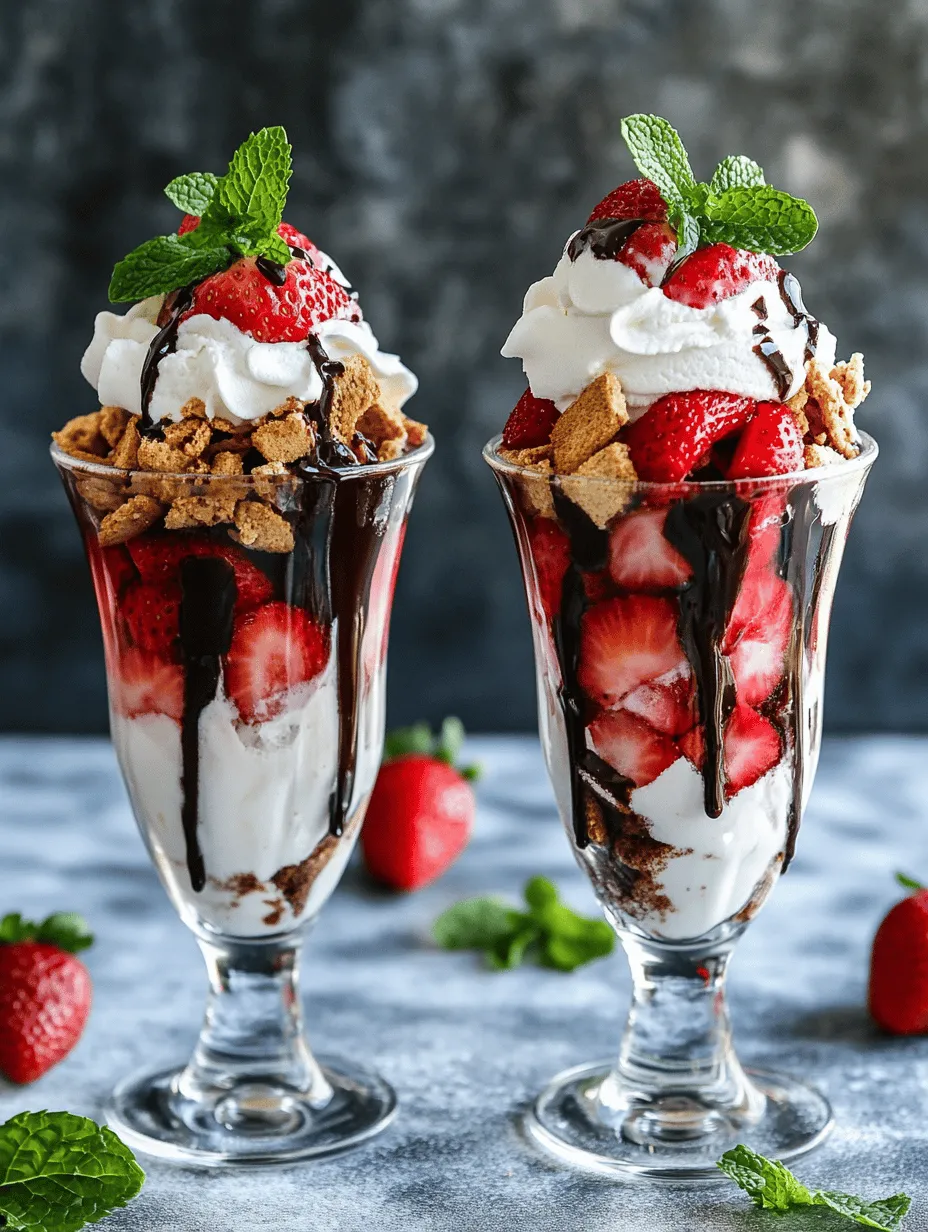
As the sun shines brighter and the days grow longer, the allure of summer desserts becomes irresistible. With its vibrant colors and refreshing flavors, a strawberry sundae captures the essence of summer in every spoonful. This delightful treat combines the sweetness of freshly picked strawberries with the creamy richness of vanilla ice cream, making it a classic favorite among dessert lovers. In this article, we will guide you through the process of creating your very own Sun-Kissed Strawberry Sundaes, a recipe that adds a unique twist to the traditional sundae. You can expect a detailed recipe, helpful tips, and insights into the flavor profiles that make this dessert a standout.
The Allure of Strawberries in Desserts
Strawberries are not just delicious; they are also packed with nutritional benefits. These little red gems are rich in vitamin C, manganese, and antioxidants, making them a wholesome addition to any dish. With their low calorie count and high fiber content, strawberries are a guilt-free indulgence that can enhance your dessert experience without compromising your health.
In the realm of summer cuisine, strawberries hold a special place. As they reach their peak season in late spring and early summer, these berries become synonymous with warm weather and outdoor gatherings. From strawberry shortcakes to fruit salads, their sweet and juicy flavor complements a wide variety of dishes. Historically, strawberries have been cherished in desserts for centuries, dating back to ancient Roman times when they were used in various culinary creations. Their enduring popularity is a testament to their versatility and appeal.
Understanding the Ingredients
To create the perfect Sun-Kissed Strawberry Sundae, one must start with the right ingredients. Here’s a closer look at the components that come together to make this dessert a delightful experience.
Fresh Strawberries: Selecting the Best for Your Sundae
The star of this dessert is undoubtedly the strawberries. When selecting fresh strawberries, look for plump, vibrant berries that are free from blemishes or soft spots. The best strawberries are bright red and fragrant, indicating their ripeness. Local farmers’ markets or grocery stores during peak season are great places to find high-quality strawberries. For an added twist, consider trying different varieties, such as the sweet and juicy June-bearers or the aromatic ever-bearing strawberries.
The Importance of Sugar and Vanilla Extract in Enhancing Flavor
While fresh strawberries bring natural sweetness to the sundae, a sprinkle of sugar can enhance their flavor even further. Adding sugar not only sweetens the berries but also helps to draw out their juices, creating a delightful syrup that complements the sundae. Additionally, vanilla extract plays a crucial role in enhancing the overall flavor profile. The warm, aromatic notes of vanilla beautifully complement the strawberries and elevate the tasting experience.
Vanilla Ice Cream: A Classic Base for Sundaes
No sundae is complete without a generous scoop of ice cream, and vanilla is the quintessential choice. Its creamy texture and neutral flavor provide the perfect canvas for the strawberries and other toppings. When selecting vanilla ice cream, opt for high-quality brands that use real vanilla beans for the best flavor. You can also experiment with homemade ice cream for an extra touch of indulgence.
Whipped Cream: The Finishing Touch for Texture and Richness
Whipped cream is the crowning glory of any sundae, adding a light and airy texture that contrasts beautifully with the creaminess of the ice cream. Whether you choose to make your own whipped cream or use store-bought, a dollop of freshly whipped cream enhances the visual appeal and flavor of your dessert. For those looking for a healthier alternative, consider using whipped coconut cream for a dairy-free option.
The Role of Chocolate Syrup and Graham Cracker Garnish in Creating Depth and Contrast
To elevate your sundae to new heights, consider adding chocolate syrup. The rich, gooey chocolate creates a delightful contrast with the sweetness of the strawberries and the creaminess of the ice cream. Drizzling chocolate syrup over the top not only enhances the flavor but also adds an attractive visual element to your sundae.
For an extra layer of texture, crushed graham crackers make a fantastic garnish. Their crunchy, buttery flavor complements the creamy components and adds a delightful crunch to each bite. This unexpected twist adds depth and makes your sundae a standout dessert.
Fresh Mint Leaves: Beyond Aesthetics, Their Flavor Profile
Finally, don’t forget to add a touch of freshness with mint leaves. Not only do they enhance the visual appeal of your sundae, but they also provide a refreshing flavor that can brighten up the overall dessert. The coolness of mint contrasts beautifully with the sweetness of strawberries, making each spoonful a balanced flavor experience.
Step-by-Step Guide to Making Sun-Kissed Strawberry Sundaes
Now that we’ve covered the key ingredients and their significance, it’s time to dive into the step-by-step process of creating your Sun-Kissed Strawberry Sundaes. This guide will help you navigate through each stage of the recipe, ensuring a delightful and satisfying outcome.
Step 1: Prepare the Strawberries
Begin by rinsing your fresh strawberries under cool water. Gently pat them dry with a paper towel or clean kitchen cloth. Next, remove the green stems and slice the strawberries into quarters or halves, depending on your preference. In a mixing bowl, combine the sliced strawberries with a sprinkle of sugar and a splash of vanilla extract. Toss gently to coat the strawberries and allow them to sit for about 10-15 minutes. This will enable the sugar to draw out the natural juices, creating a flavorful syrup.
Step 2: Scoop the Ice Cream
While the strawberries are macerating, it’s time to prepare the ice cream. Using an ice cream scoop, place generous scoops of vanilla ice cream into serving bowls or sundae glasses. For a classic presentation, aim for two or three scoops per serving.
Step 3: Assemble the Sundae
Once the strawberries have released their juices, it’s time to assemble your sundae. Start by spooning the macerated strawberries over the scoops of ice cream, allowing the syrup to drizzle down the sides. Next, add a generous dollop of whipped cream on top. If you’re feeling adventurous, drizzle chocolate syrup over the whipped cream for an extra touch of indulgence.
Step 4: Add the Finishing Touches
To complete your Sun-Kissed Strawberry Sundae, sprinkle crushed graham crackers over the top for added texture. Finally, garnish with fresh mint leaves for a pop of color and a refreshing touch.
Now that you have your beautiful, layered sundae, you are ready to indulge in this delightful summer treat!
—
In the next part of this article, we will explore tips for achieving the best results with your sundae, as well as answer some common questions about this delightful dessert. Stay tuned for more!
Preparing the Strawberries: Maceration Explained
Macerating strawberries is a crucial step in creating the perfect Sun-Kissed Strawberry Sundaes. This process enhances the strawberries’ natural sweetness and allows their juices to blend beautifully, providing a luscious base for your sundae. To macerate strawberries, start by washing them thoroughly to remove any dirt or pesticides. Remove the stems and slice the strawberries into quarters or halves, depending on their size.
Next, place the sliced strawberries in a bowl and sprinkle them with granulated sugar—about one to two tablespoons for every cup of strawberries, depending on your desired sweetness. For additional flavor, you can also add a splash of lemon juice or vanilla extract. Gently toss the strawberries to coat them evenly with sugar and let them sit for at least 30 minutes. During this time, the sugar will draw out the moisture from the strawberries, creating a delightful syrup that will enhance the overall flavor of your sundae.
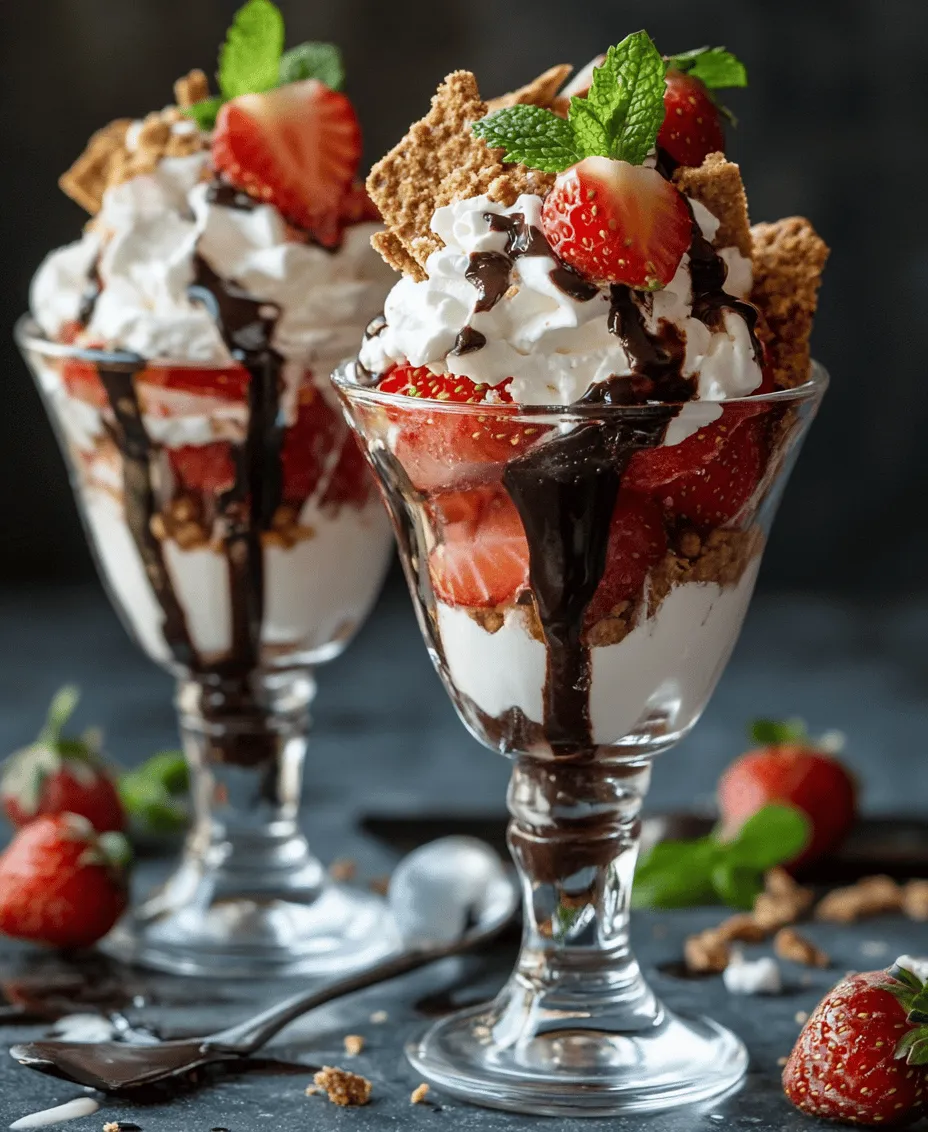
Assembling the Sundae: Layering for Visual Appeal and Flavor Distribution
Now that your strawberries are macerated and bursting with flavor, it’s time to assemble your Sun-Kissed Strawberry Sundaes. The key to an eye-catching sundae is layering. Begin with a scoop of your chosen ice cream—classic vanilla complements the strawberries perfectly. Use a sundae glass or a large bowl to allow for a generous display of layers.
1. First Layer: Place a scoop of ice cream at the bottom, ensuring it fills the base of your serving dish.
2. Second Layer: Add a generous spoonful of the macerated strawberries along with some of the strawberry syrup. This creates a fresh and fruity foundation.
3. Third Layer: Repeat the process by adding another scoop of ice cream, followed by more macerated strawberries, and continue layering until you reach the top of your dish.
4. Final Touch: Finish with a swirl of whipped cream on top, allowing it to cascade down the sides for a beautiful presentation.
Feel free to sprinkle some chopped nuts or additional fresh strawberries on top for an extra crunch and freshness. The layering not only creates a stunning visual effect but also ensures that every spoonful is a balanced mix of flavors.
Tips for Achieving the Perfect Whipped Cream Topping
Whipped cream is an essential component of any sundae, and achieving the perfect texture and flavor can elevate your dessert. Here are some tips to ensure your whipped cream is light, fluffy, and delicious:
– Use Cold Ingredients: Start with cold heavy cream (at least 36% fat content) for the best results. Chill your mixing bowl and beaters in the freezer for about 10-15 minutes before whipping. The colder your ingredients, the better the cream will whip.
– Add Sweetener and Flavor: For a touch of sweetness, incorporate powdered sugar instead of granulated sugar, as it dissolves more easily. You might also add vanilla extract or almond extract for an extra flavor boost. A teaspoon or two should suffice.
– Whip to Soft Peaks: Begin whipping the cream on low speed, gradually increasing to medium-high. Stop whipping once you reach soft peaks. Over-whipping can lead to a grainy texture, so keep an eye on it.
– Stabilize Your Cream: If you want your whipped cream to hold its shape for longer, consider adding a stabilizer such as cornstarch or gelatin. For cornstarch, mix about 1 tablespoon into the powdered sugar before adding it to the cream. For gelatin, dissolve 1 teaspoon in water and allow it to cool slightly before drizzling it into the cream as you whip.
Creative Ideas for Drizzling Chocolate Syrup
Chocolate syrup is a classic sundae topping that adds richness and depth. There are many ways to elevate your chocolate syrup game. Here are some creative ideas:
– Homemade Chocolate Sauce: Instead of store-bought syrup, consider making your own chocolate sauce. Melt chocolate chips with a bit of cream over low heat until smooth. This fresh sauce can be customized with flavors like peppermint or orange zest.
– Infused Chocolate: Experiment with different flavors by infusing your chocolate syrup. For instance, adding a pinch of sea salt can enhance the sweetness of the chocolate, while a splash of espresso can provide a delightful mocha twist.
– Layered Drizzle: While assembling your sundae, drizzle chocolate syrup between layers of ice cream and strawberries. This way, every bite gets a taste of the chocolate.
– Garnish with Chocolate Shavings: After drizzling chocolate syrup, add some chocolate shavings or curls on top of the whipped cream for an elegant touch.
Exploring Variations of Strawberry Sundaes
While classic Sun-Kissed Strawberry Sundaes are delicious, the beauty of this dessert lies in its versatility. Here are some exciting variations you can explore:
Alternative Fruits: Experimenting with Seasonal Berries
While strawberries are the star of this sundae, feel free to mix in other seasonal berries. Blueberries, raspberries, and blackberries all pair beautifully with ice cream. You can create a mixed berry sundae by combining different berries for a colorful and fruity twist.
Dairy-Free and Vegan Options for Ice Cream and Whipped Cream
For those who are lactose intolerant or following a vegan lifestyle, there are plenty of delicious alternatives. Many brands offer coconut or almond-based ice creams that mimic the creamy texture of traditional ice cream. For whipped cream, consider using coconut cream or a store-bought vegan whipped topping that can be found in most grocery stores.
Flavoring Ideas: Adding Liqueurs or Flavored Syrups
For an adult twist, consider adding liqueurs to your sundae. A splash of strawberry liqueur, amaretto, or even a fruity wine can enhance the flavor profile. Additionally, flavored syrups like caramel or hazelnut can be drizzled over the sundae for added complexity.
Incorporating Different Toppings: Nuts, Fruits, and More
Get creative with your toppings! Chopped nuts, such as almonds or pecans, can add a delightful crunch. Fresh mint leaves can provide a refreshing contrast, while granola can add texture. You can also use crumbled cookies or cake pieces to create a sundae with layers of flavors and textures.
The Experience of Enjoying Sun-Kissed Strawberry Sundaes
Sundaes are more than just a dessert; they are an experience to be enjoyed. Here’s how you can enhance the enjoyment of your Sun-Kissed Strawberry Sundaes:
Pairing with Summer Activities: Picnics, Barbecues, and Family Gatherings
These sundaes are perfect for summer gatherings. Whether you’re hosting a backyard barbecue or enjoying a picnic in the park, Sun-Kissed Strawberry Sundaes can be a refreshing finale. Prepare the components ahead of time and assemble them on-site for a fun and interactive dessert experience.
Creating the Perfect Ambiance for Serving Sundaes
Presentation matters! Serve your sundaes in elegant glassware to create a festive atmosphere. Consider placing them on a beautifully set table with fresh flowers or colorful tablecloths. Dimmed lights or fairy lights can add to the magical feel, making your sundae experience even more special.
The Sensory Experience: Flavor, Texture, and Presentation
Enjoying a sundae is a sensory delight. The sweetness of the strawberries, the creaminess of the ice cream, and the lightness of the whipped cream come together to create a harmonious experience. The vibrant colors of the ingredients create an enticing visual, while the variety of textures—from the crunch of nuts to the smoothness of the cream—enhances the overall enjoyment.
Conclusion
Sun-Kissed Strawberry Sundaes are a celebration of summer, bringing together fresh strawberries, creamy ice cream, and decadent toppings in a delightful dessert. They are simple to prepare, yet incredibly satisfying, making them an ideal choice for various occasions—from casual family dinners to festive gatherings.
Remember to embrace the versatility of this recipe. Experiment with different fruits, flavors, and toppings to create your own unique sundae masterpieces. Don’t hesitate to share these delicious creations with loved ones, creating joyful memories around the table.
The next time you’re in the mood for a refreshing treat, gather your ingredients, and dive into the world of Sun-Kissed Strawberry Sundaes. The joy of this timeless dessert awaits!
