
Introduction
Butterscotch Bliss Bars are the epitome of comfort food, combining rich flavors with a chewy texture that makes them an irresistible treat for any occasion. The allure of these bars lies not only in their delightful taste but also in their nostalgic connection to childhood desserts that evoke warm memories of family gatherings and home-baked goodness. As modern home bakers increasingly seek easy-to-follow recipes that deliver big on flavor without the fuss, Butterscotch Bliss Bars stand out as a perfect balance of simplicity and indulgence.
Whether you’re a seasoned baker or a novice in the kitchen, this recipe invites you to create something special that will not only satisfy your sweet tooth but also impress your family and friends. With just a handful of ingredients and straightforward steps, you can whip up a batch of these delicious bars that are sure to become a staple in your dessert repertoire.
Understanding Butterscotch Bliss Bars
To truly appreciate Butterscotch Bliss Bars, it’s essential to understand what butterscotch is and how its unique flavor profile enhances these delectable treats. Butterscotch is a confectionery made primarily from brown sugar and butter, which are cooked together until caramelized to create a rich, sweet, and buttery flavor. This distinctive taste is both nostalgic and comforting, making it a favorite in a variety of desserts—from cookies to puddings and, of course, bliss bars.
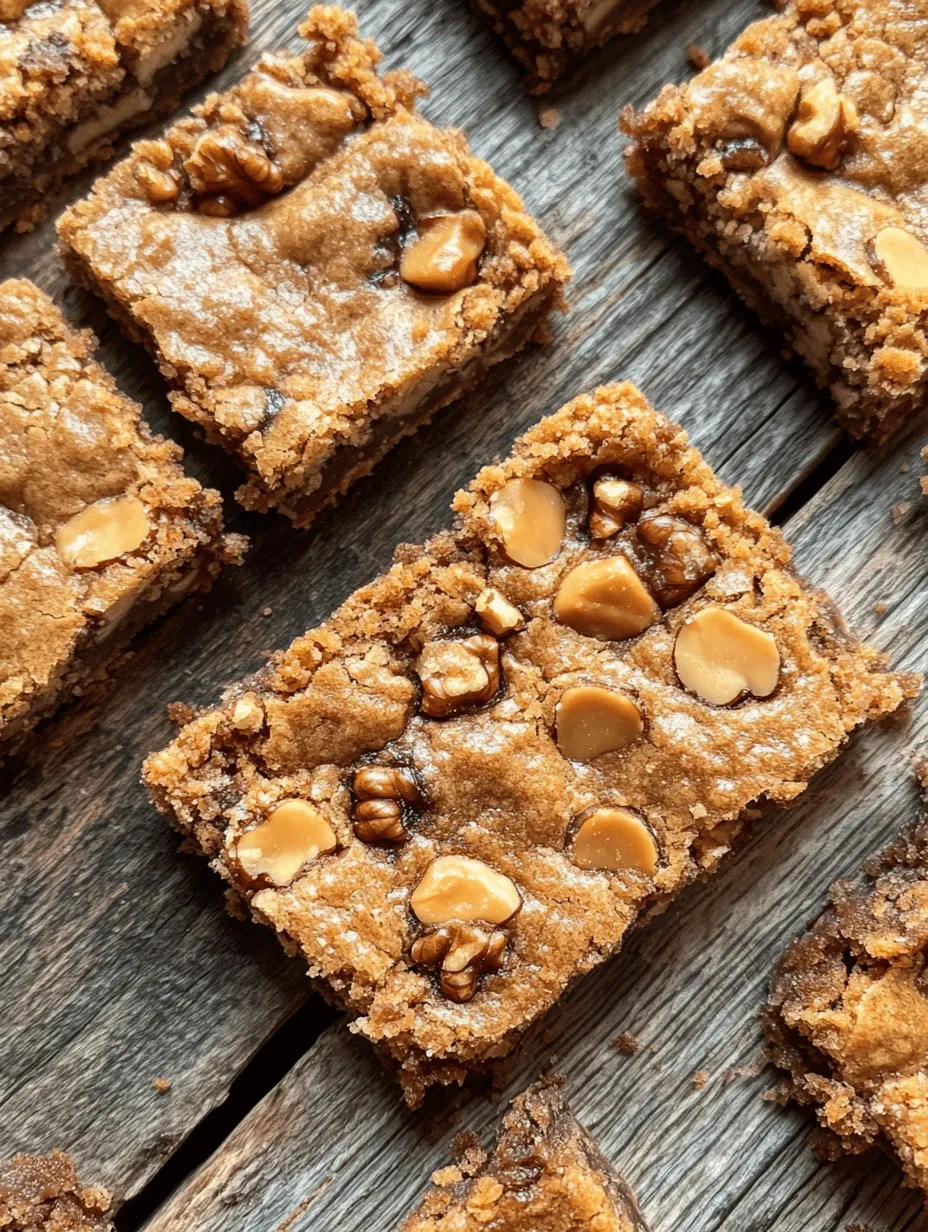
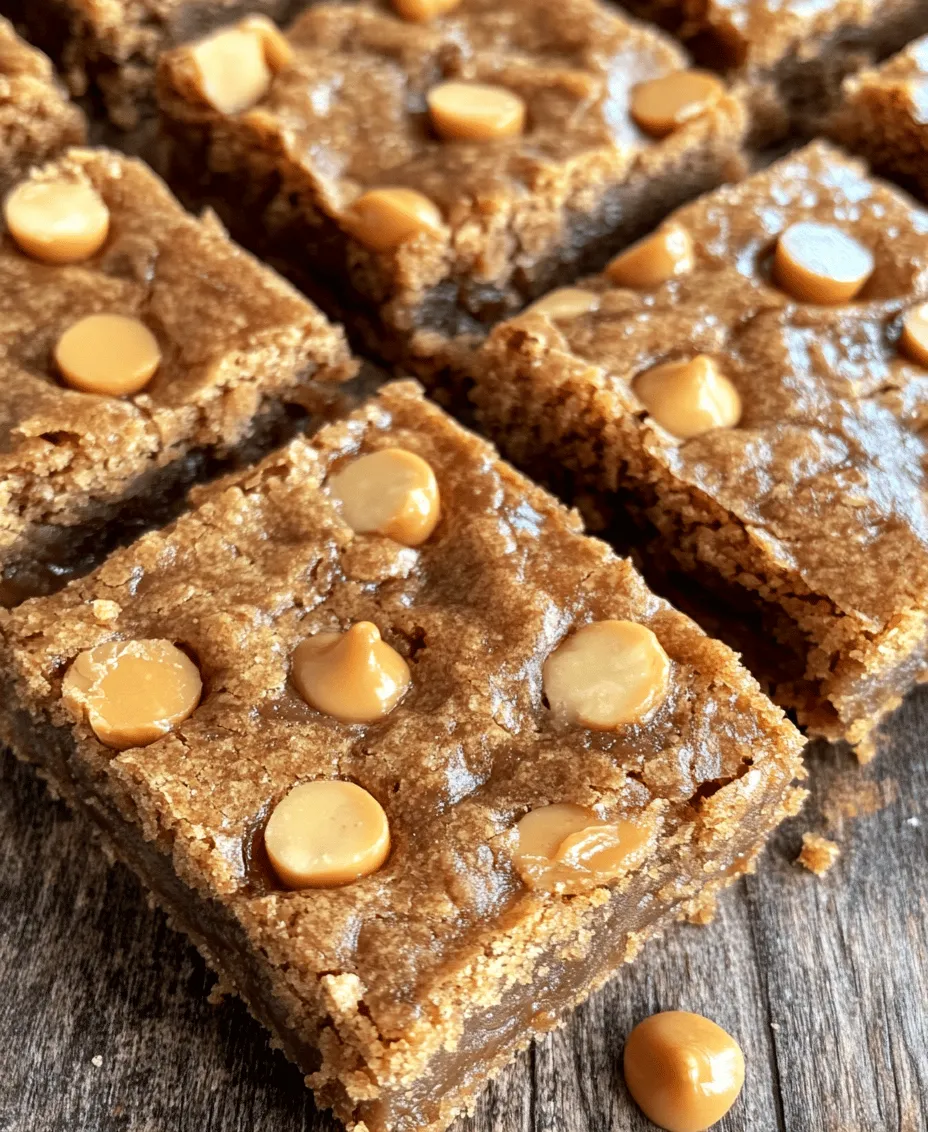
Butterscotch Bliss Bars have earned their reputation as a beloved dessert largely due to their deliciously sweet and slightly nutty flavor, paired with a chewy texture that melts in your mouth. The beauty of these bars lies in their versatility; they can be enjoyed as an afternoon snack, dessert for dinner parties, or even as a sweet treat to accompany your morning coffee. The delightful combination of buttery butterscotch and the optional crunch of walnuts creates a perfect harmony that is sure to please any palate.
The history of butterscotch in desserts is rich and varied, dating back to the 19th century in England. Early recipes often included only a few ingredients, showcasing the simplicity and depth of flavor that butterscotch embodies. Over time, the ingredient has evolved into a beloved staple in American kitchens, inspiring countless variations of desserts. Butterscotch Bliss Bars pay homage to this classic flavor while providing a modern twist that makes them accessible and enjoyable for today’s bakers.
Ingredients Overview
To make Butterscotch Bliss Bars, you’ll need a few key ingredients, each contributing to the overall flavor and texture of the bars. Here’s a detailed breakdown of each ingredient and its role in the recipe:
– Unsalted Butter: The foundation of any good dessert, unsalted butter is crucial for achieving the right texture and flavor. It adds moisture and richness to the bars, ensuring they remain soft and chewy. Using unsalted butter allows you to control the amount of salt in your recipe, which is especially important for balancing sweetness.
– Brown Sugar vs. Granulated Sugar: The choice of sugar plays a significant role in the flavor profile of your bars. Brown sugar, with its molasses content, adds depth and moisture, while granulated sugar provides sweetness. In this recipe, brown sugar is the star, enhancing the butterscotch flavor and contributing to the bars’ chewy texture.
– Eggs: Eggs act as a binding agent in the recipe, helping to hold the ingredients together while also adding moisture. They contribute to the overall structure of the bars, ensuring a soft and tender crumb.
– Vanilla Extract: A touch of vanilla extract elevates the flavor complexity of the bars, bringing out the sweetness of the butterscotch. It adds warmth and depth, making each bite even more delightful.
– All-Purpose Flour: Flour provides the necessary structure and stability to the bars. It helps create a balanced texture that is neither too dense nor too crumbly. The right amount of flour ensures that the bars hold together well while still being soft and chewy.
– Baking Powder: As a leavening agent, baking powder helps the bars rise slightly during baking. This contributes to a light and airy texture, ensuring that the bars aren’t overly heavy.
– Salt: While it may seem counterintuitive, salt is essential for balancing sweetness. A pinch of salt enhances the flavors of the other ingredients and prevents the bars from tasting overly sweet.
– Butterscotch Chips: The star ingredient that defines these bliss bars, butterscotch chips add bursts of sweet, buttery flavor throughout. They melt beautifully during baking, creating a luscious and gooey texture that is simply irresistible.
– Chopped Walnuts: While optional, chopped walnuts provide an extra layer of texture and flavor. Their nutty crunch complements the sweetness of the butterscotch, adding a delightful contrast that many people adore.
Step-by-Step Instructions
Preparing the Baking Environment
Before diving into the mixing process, it’s essential to prepare your baking environment. A well-organized space can make your baking experience smoother and more enjoyable. Here’s what you need to do:
1. Preheat the Oven: Begin by preheating your oven to 350°F (175°C). Preheating is crucial as it ensures that the bars bake evenly and rise properly.
2. Prepare the Baking Pan: Line a 9×13-inch baking pan with parchment paper, allowing some overhang on the sides for easy removal later. This step prevents the bars from sticking to the pan and makes clean-up a breeze. If you don’t have parchment paper, you can grease the pan with butter or cooking spray, but parchment is recommended for the best results.
Mixing the Ingredients
Once your baking environment is prepared, it’s time to mix the ingredients. Follow these step-by-step instructions to create the perfect batter for your Butterscotch Bliss Bars:
1. Cream the Butter and Sugar: In a large mixing bowl, add the unsalted butter and brown sugar. Using an electric mixer or a whisk, cream the butter and sugar together until the mixture is light and fluffy. This process incorporates air, which contributes to the texture of the bars.
2. Add the Eggs and Vanilla: Once the butter and sugar are well combined, add the eggs one at a time, mixing well after each addition. Then, pour in the vanilla extract. Continue to mix until everything is fully incorporated and the batter appears smooth.
3. Combine Dry Ingredients: In a separate bowl, whisk together the all-purpose flour, baking powder, and salt. This ensures that the leavening agent is evenly distributed throughout the flour.
4. Incorporate Dry Ingredients into Wet: Gradually add the dry ingredient mixture to the wet ingredients, mixing gently until just combined. Be careful not to overmix, as this can lead to dense bars.
5. Fold in Butterscotch Chips and Nuts: Finally, gently fold in the butterscotch chips and chopped walnuts (if using). This step ensures that the chips and nuts are evenly distributed throughout the batter.
With these initial steps complete, you’re ready to pour the batter into the prepared pan and continue with the baking process. The anticipation of the sweet, buttery aroma filling your kitchen is just around the corner! Stay tuned for the next part, where we’ll cover the baking process, cooling tips, and ways to serve these delightful Butterscotch Bliss Bars.
Techniques for Creaming Butter and Sugars for Optimal Fluffiness
The key to achieving airy and fluffy Butterscotch Bliss Bars lies in the creaming process. Begin with softened butter at room temperature; this allows for better incorporation of air. Use a stand mixer or a hand mixer to beat the butter until it’s light in color and creamy in texture. Gradually add granulated sugar and brown sugar, continuing to mix for about 3 to 5 minutes. The mixture should be light, fluffy, and nearly doubled in volume. This step is crucial as it creates a light structure that will support the bars during baking.
The Significance of Adding Eggs and Vanilla Correctly
Once you’ve achieved the perfect creamed mixture, it’s time to add the eggs and vanilla extract. Make sure to add the eggs one at a time, allowing each egg to fully incorporate before adding the next. This gradual addition helps to maintain the airiness of the batter. Also, don’t forget to scrape down the sides of the bowl to ensure all ingredients are well mixed. The vanilla extract not only adds flavor but also enhances the overall sweetness, making your bars irresistibly delicious.
Incorporating Dry Ingredients
With the wet ingredients combined, it’s time to incorporate the dry ingredients. In a separate bowl, whisk together the all-purpose flour, baking powder, and salt. This step ensures even distribution of the leavening agent and prevents clumping. Gradually add the dry mixture to the wet ingredients, mixing on low speed. It’s important to mix just until combined; overmixing can lead to dense bars.
Tips for Mixing Flour to Avoid Overworking the Batter
To avoid overworking the batter, use a spatula to fold in the flour, rather than using the mixer. This gentle approach helps keep the gluten development to a minimum, resulting in soft, tender bars. If you notice any streaks of flour remaining, stop mixing immediately. The goal is to have a homogenous batter without any visible dry ingredients.
Adding Butterscotch Chips and Walnuts
Now comes the fun part—adding the butterscotch chips and walnuts for that signature crunch and sweetness. Gently fold them into the batter using a spatula, ensuring an even distribution. This step is essential because it ensures that every bite of the bars is filled with the rich flavor of butterscotch and the crunch from the walnuts.
Ensuring Even Distribution for a Perfect Bite Every Time
To ensure that each bar has an equal amount of chips and nuts, consider layering the batter in the baking pan. Start by spreading half of the batter, then sprinkle a portion of the butterscotch chips and walnuts, followed by the remaining batter on top. This layering technique guarantees that you’ll have a perfect bite filled with the delightful flavors you’ve worked hard to create.
Baking Process
Preheat your oven to 350°F (175°C) and line a 9×13 inch baking dish with parchment paper, leaving a bit of overhang on the sides. This will help with easy removal later. Pour your batter into the prepared pan, smoothing the top with a spatula. Bake in the preheated oven for about 25-30 minutes, or until the edges are golden and a toothpick inserted in the center comes out clean or with a few moist crumbs.
Understanding Baking Time and Temperature for Ideal Results
Baking time can vary based on your oven, so it’s wise to start checking at the 25-minute mark. The bars should rise and have a soft, slightly springy texture when lightly pressed. If you notice they’re browning too quickly, you can tent them with aluminum foil to prevent over-baking while the center finishes cooking.
How to Know When the Bars Are Done
To ensure your Butterscotch Bliss Bars are perfectly baked, look for a few key indicators. The edges should be set and slightly pulling away from the sides of the pan, while the center should have a slight jiggle but not be liquid. A toothpick inserted should come out with a few moist crumbs, indicating that they are done without being overcooked.
Cooling and Serving Butterscotch Bliss Bars
Once your bars are out of the oven, allow them to cool in the pan on a wire rack for about 10-15 minutes. Cooling is crucial as it helps the bars set, making them easier to cut. After they’ve cooled slightly, use the parchment paper overhang to lift them out of the pan and onto a cutting board.
Importance of Cooling in Achieving the Right Texture
Cooling the bars completely before cutting is essential for achieving the right texture. If you cut them while they are warm, they may crumble and fall apart. Allowing them to cool fully will result in clean, beautiful squares that hold their shape.
Best Methods for Transferring and Cutting Bars
For cutting, use a sharp knife or a pizza cutter for clean edges. To prevent sticking, lightly grease the knife or run it under hot water before slicing. Wipe the knife clean between cuts to avoid having crumbs in your bars.
Serving Suggestions: Pairing with Coffee, Ice Cream, or as a Standalone Treat
These Butterscotch Bliss Bars are delicious on their own but can be taken up a notch when paired with a scoop of vanilla ice cream or a dollop of whipped cream. They also go wonderfully with a cup of coffee or tea, making them a perfect afternoon treat. For an elegant dessert, serve them with a drizzle of caramel sauce or chocolate syrup on the side.
Nutritional Information
Each serving of Butterscotch Bliss Bars, typically cut into 24 squares, contains approximately 200 calories. The nutritional breakdown includes about 10 grams of fat, 28 grams of carbohydrates, and 2 grams of protein. While these bars are indulgent, enjoying them in moderation allows you to savor their rich, buttery flavor without overdoing it.
Discussing Indulgence Versus Moderation
It’s important to remember that desserts like these should be enjoyed as part of a balanced diet. While Butterscotch Bliss Bars are a delightful treat, moderation is key to maintaining a healthy lifestyle. Share them with friends and family to spread the joy without overindulging yourself.
Common Variations and Substitutions
If you’re looking to mix things up, consider these variations of the classic Butterscotch Bliss Bars.
Chocolate Chip Bliss Bars: A Twist on the Original
For chocolate lovers, consider adding semi-sweet chocolate chips in place of or in addition to the butterscotch chips. This combination of flavors creates a rich, decadent treat that’s hard to resist.
Gluten-Free Option: Alternative Flours to Consider
If you need a gluten-free option, substitute all-purpose flour with a 1:1 gluten-free flour blend. This keeps the texture consistent while accommodating dietary restrictions.
Vegan Adaptation: Substituting Key Ingredients for a Plant-Based Version
To make these bars vegan, substitute the butter with a plant-based margarine and replace the eggs with a flax egg (1 tablespoon of ground flaxseed mixed with 2.5 tablespoons of water, allowed to sit for 5 minutes). Use dairy-free butterscotch chips to maintain the flavor.
Flavor Additions: Introducing Spices Like Cinnamon or Nutmeg for a Seasonal Twist
For a seasonal flair, consider adding spices like cinnamon or nutmeg to the dry ingredients. These warm flavors pair beautifully with butterscotch and can elevate your bars for special occasions or holidays.
Conclusion
Butterscotch Bliss Bars are not only simple to make but also a delightful treat that brings comfort and joy. Their rich flavor and chewy texture make them a favorite among family and friends. We encourage you to try this recipe, savor the baking process, and share the delicious results with those you love. There’s something truly special about homemade desserts—they have the power to create memories and bring people together, one blissful bite at a time. Enjoy your baking journey and the sweet rewards it brings!