
Introduction
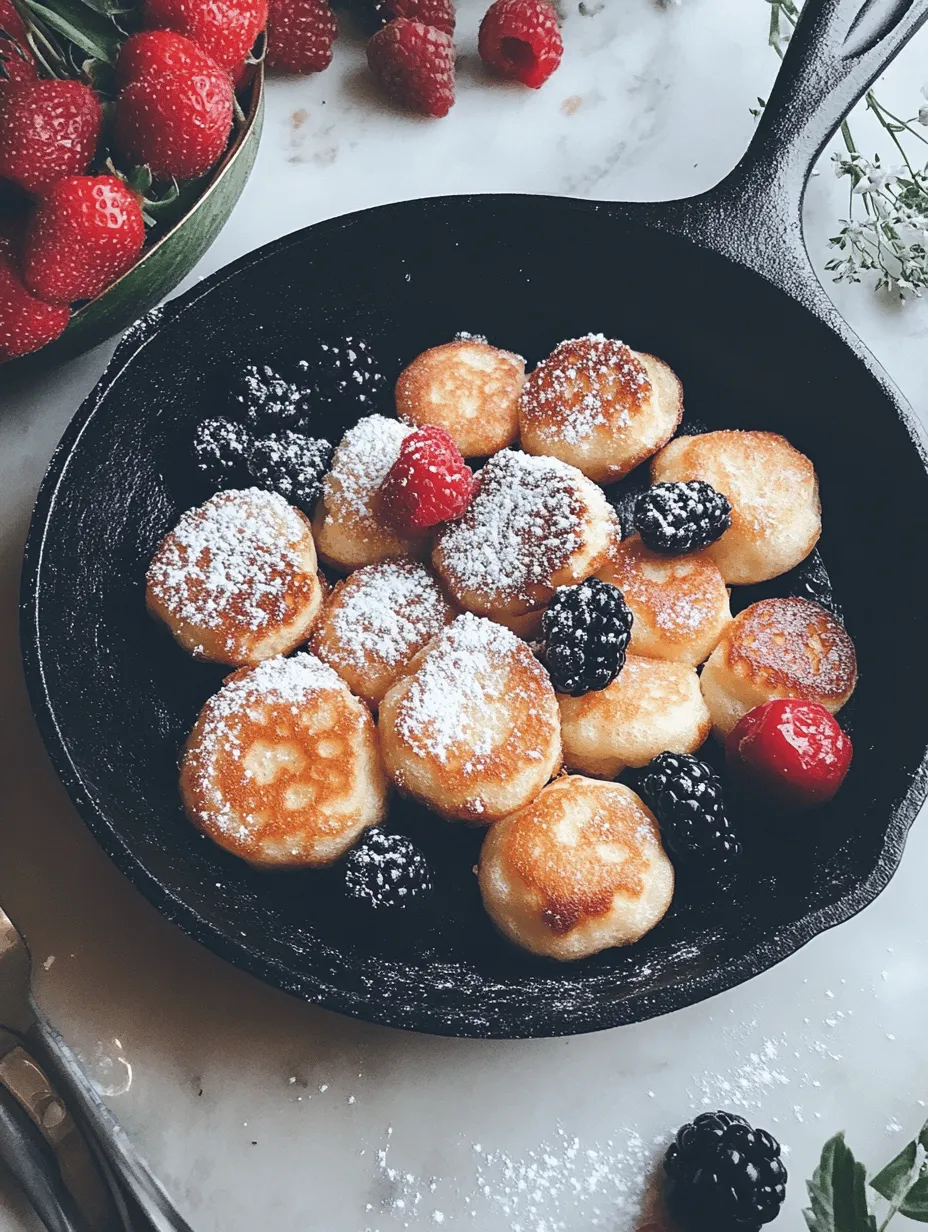
Poffertjes are a beloved Dutch treat that captures the essence of comfort and joy in every bite. These fluffy, mini pancakes are light, airy, and slightly sweet, making them a favorite among both children and adults. Traditionally enjoyed at fairs and markets throughout the Netherlands, poffertjes have become a cherished dessert that evokes nostalgia and warmth. Making poffertjes at home is not only easy but also a fun way to bring a taste of Dutch culture to your kitchen.
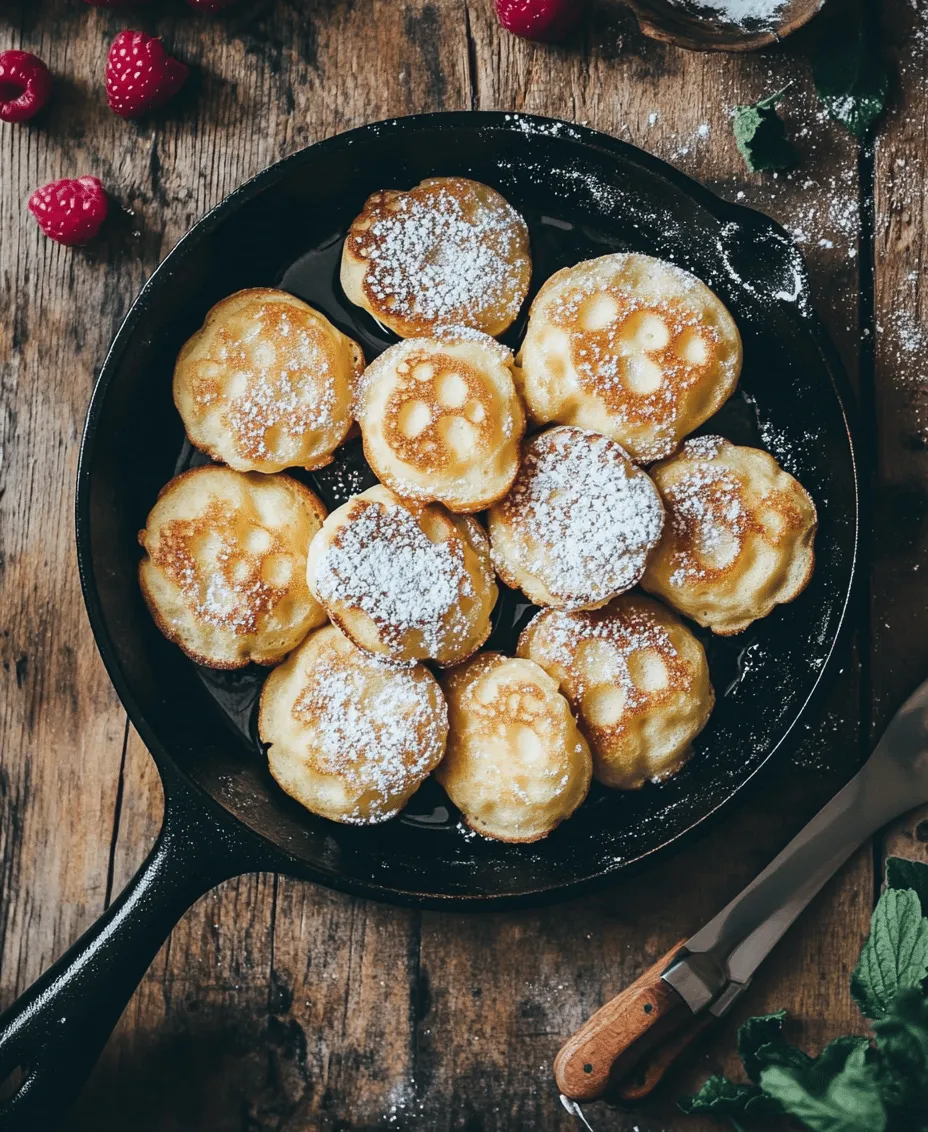
One of the best ways to achieve the perfect poffertjes is by using a cast iron skillet. This versatile cookware is renowned for its ability to distribute heat evenly and retain it, which is essential for cooking poffertjes to golden perfection. The high heat retention ensures that each poffertje is cooked thoroughly while maintaining its characteristic fluffy texture. As you prepare to embark on this delicious journey, you’ll discover that making poffertjes at home is not just about following a recipe; it’s about creating delightful memories with family and friends.
Understanding Poffertjes
Poffertjes are often described as a cross between a pancake and a sponge cake, but their unique characteristics set them apart. These delightful treats are typically smaller and thicker than traditional pancakes, with a soft, pillowy interior. Poffertjes are made using a specially crafted batter that includes yeast, which gives them their signature lightness and allows them to puff up beautifully as they cook.
Culturally, poffertjes hold significant value in the Netherlands. Traditionally served at fairs, markets, and festive gatherings, they are often enjoyed with a dusting of powdered sugar and a dollop of butter. The social aspect of enjoying poffertjes—whether at a bustling market stall or a cozy family gathering—adds to their charm, making them more than just a snack; they are a symbol of togetherness and celebration.
When compared to other similar treats, such as mini pancakes or American-style pancakes, poffertjes stand out due to their unique texture and flavor profile. While mini pancakes might be light and fluffy, poffertjes have a denser, more cake-like quality, thanks to the yeast in the batter. This results in a delightful contrast between the soft exterior and the airy interior, creating a satisfying bite that is both indulgent and comforting.
The Benefits of Using a Cast Iron Skillet
Cast iron cookware has been a staple in kitchens for centuries, and for good reason. Using a cast iron skillet to make poffertjes comes with numerous benefits that enhance the cooking experience and the final product. One of the primary advantages is the skillet’s ability to provide even heat distribution. This means that every poffertje cooks uniformly, preventing burnt edges while ensuring a perfectly golden-brown exterior.
Another significant benefit of cast iron skillets is their superior heat retention. Once the skillet is heated, it maintains its temperature, allowing for consistent cooking. This is particularly important for poffertjes, as the batter needs to rise and cook evenly without being subjected to fluctuating temperatures. As a result, using a cast iron skillet can lead to poffertjes that are not only beautifully browned but also light and fluffy on the inside.
To ensure that your cast iron skillet lasts for generations, proper maintenance is essential. Make sure to season your skillet regularly to create a natural non-stick surface and prevent rusting. After each use, clean it with warm water and a gentle scrub, avoiding soap, which can strip the seasoning. Remember to dry it thoroughly and apply a light coat of oil to keep it in excellent condition for your next poffertjes adventure.
Ingredients Breakdown
To create the perfect poffertjes, understanding the role of each ingredient in the recipe is crucial. Here’s a detailed breakdown of the ingredients you’ll need:
– All-Purpose Flour: This forms the backbone of the batter and is responsible for the structure and texture of the poffertjes. It provides the necessary gluten to hold the batter together while allowing for a light and fluffy result.
– Milk: Milk adds moisture and richness to the batter, ensuring that the poffertjes are soft and tender. The fat content in milk also contributes to a delightful flavor.
– Granulated Sugar: This ingredient balances the sweetness of the poffertjes. The sugar not only sweetens the batter but also aids in browning during the cooking process, resulting in a beautiful golden color.
– Eggs: Eggs play a vital role in binding the ingredients together and providing leavening. They add richness and contribute to the overall texture, making poffertjes moist and tender.
– Instant Yeast: The key to achieving the lightness and fluffiness of poffertjes, instant yeast helps the batter rise. This yeast works quickly, allowing your poffertjes to develop their signature airy quality without needing a long resting period.
– Salt: A pinch of salt enhances the flavor of the poffertjes, balancing the sweetness and bringing out the other flavors in the batter.
– Vanilla Extract: This ingredient adds depth and aroma, infusing the poffertjes with a warm, inviting flavor that complements the sweetness.
– Unsalted Butter: Melted butter adds richness and flavor to the batter, contributing to the overall taste and texture of the poffertjes.
– Powdered Sugar and Berries/Syrup: While optional, these toppings are commonly used to serve poffertjes. A dusting of powdered sugar adds a touch of sweetness and elegance, while fresh berries or syrup can enhance the flavor and presentation.
With these ingredients in mind, you’re well on your way to creating mouthwatering poffertjes that will delight your family and friends.
Step-by-Step Guide to Making Poffertjes
Now that you understand the essence of poffertjes and the benefits of using a cast iron skillet, it’s time to roll up your sleeves and start cooking! Here’s a step-by-step guide to making your own fluffy poffertjes at home.
1. Prepare the Batter: In a large mixing bowl, combine the all-purpose flour, granulated sugar, salt, and instant yeast. In a separate bowl, whisk together the milk, eggs, melted butter, and vanilla extract. Gradually pour the wet ingredients into the dry ingredients, stirring until you have a smooth batter. The batter should be thick yet pourable.
2. Let the Batter Rise: Cover the bowl with a clean kitchen towel and let the batter rise in a warm place for about 30 minutes. This resting period allows the yeast to activate, resulting in a fluffier texture.
3. Preheat the Skillet: While the batter rises, place your cast iron skillet over medium heat. Allow it to heat up for several minutes. To test if the skillet is ready, sprinkle a few drops of water onto the surface; they should sizzle and evaporate immediately.
4. Grease the Skillet: Once the skillet is hot, add a small amount of unsalted butter to each mold or the surface of the skillet to prevent sticking. Use a brush or a paper towel to evenly coat the cooking surface.
5. Cook the Poffertjes: Using a piping bag or a small ladle, pour the batter into the molds of the skillet, filling each mold about halfway. Cook for about 1-2 minutes, or until bubbles form on the surface and the edges appear set.
6. Flip and Finish Cooking: Carefully flip each poffertje using a spatula or fork. Cook for an additional 1-2 minutes on the other side until they are golden brown and cooked through.
7. Serve and Enjoy: Remove the poffertjes from the skillet and place them on a serving plate. Dust with powdered sugar and serve with fresh berries or syrup, if desired.
With these steps, you’ll be well on your way to creating delightful poffertjes in your own kitchen. The process is not only straightforward but also an enjoyable activity that brings the whole family together. Stay tuned for more tips and variations to elevate your poffertjes experience!
Preparing the Batter
To create the fluffy, delightful poffertjes that are beloved in Dutch cuisine, you first need to prepare your batter. The key to a successful poffertjes recipe lies in the ingredients and how they are combined. Start by gathering your dry ingredients: flour, baking powder, sugar, and a pinch of salt. In a separate bowl, whisk together your wet ingredients: milk, eggs, and vanilla extract. This separation is crucial, as it allows for even distribution of the leavening agent and ensures a light, airy texture.
Importance of Whisking Dry and Wet Ingredients Separately
Whisking the dry and wet ingredients separately prevents clumping and promotes a smoother batter. When dry ingredients are combined with wet ones all at once, you run the risk of flour pockets forming, which can lead to uneven cooking and texture. By mixing them separately, you ensure that the baking powder activates properly, resulting in poffertjes that rise beautifully.
Achieving the Right Consistency for the Batter
The ideal consistency for poffertjes batter should be thick but pourable. It should coat the back of a spoon without being too runny. If your batter is too thick, it may result in dense poffertjes; if it’s too runny, they won’t hold their shape. A good rule of thumb is to start with a ratio of 2 cups of flour to 1 cup of milk and adjust as necessary. If you find your batter too thick, gradually add a bit more milk until you reach the desired consistency.
Preheating the Skillet
Once your batter is ready, it’s time to heat your cast iron skillet. Preheating is essential for achieving that golden-brown exterior while ensuring the inside remains fluffy. Set your skillet over medium heat for about 5-10 minutes before cooking your poffertjes.
Tips for Knowing When the Skillet is Ready
To test if your skillet is hot enough, you can use a simple water droplet test. Sprinkle a few drops of water onto the skillet; if they dance and evaporate almost immediately, your skillet is ready. Alternatively, you can sprinkle a small amount of flour on the skillet surface; it should sizzle upon contact.
Importance of Butter for Non-Stick Cooking
Before pouring in your batter, generously coat the skillet with unsalted butter. Butter not only adds flavor but also helps prevent sticking, which is crucial for perfectly shaped poffertjes. For an even better non-stick experience, consider using a combination of butter and a small amount of oil. The oil raises the smoke point of the butter, allowing for a higher cooking temperature without burning.
Cooking the Poffertjes
Now comes the fun part—cooking your poffertjes! Using a small ladle or pouring device, carefully pour the batter into the skillet, filling each mold about halfway. This will allow them to puff up as they cook.
Optimal Spacing and Cooking Time for Perfect Poffertjes
When cooking poffertjes, it’s vital to maintain the right spacing. Be sure to leave enough room between each one to allow for expansion. Cooking time is typically around 2-3 minutes per side. As they cook, you’ll notice the edges starting to set while the center remains slightly glossy.
Recognizing Signs of Readiness
One of the telltale signs that your poffertjes are ready to flip is the appearance of tiny bubbles forming on the surface. Additionally, the edges should appear firm and set. These visual cues indicate that they are cooked on one side and ready for a flip.
Flipping Techniques
Flipping can be a bit tricky, but with practice, you’ll master it. Using a thin spatula, gently slide it under the poffertje and flip it swiftly in one motion. This technique reduces the risk of breaking.
Best Practices for Flipping Without Breaking
To avoid breaking your poffertjes, ensure they’re cooked adequately before attempting to flip. If they seem too soft, give them a little more time. Additionally, using a non-stick skillet or well-seasoned cast iron will help in achieving a successful flip.
Visual Cues for Doneness on Both Sides
Once flipped, your poffertjes should cook for another 1-2 minutes until they are golden brown on the other side. The final result should be a fluffy, golden treat that is firm to the touch but still yields when you press it slightly.
Serving Suggestions
Traditional Serving Methods for Poffertjes
Poffertjes are traditionally served with a dusting of powdered sugar and a dollop of butter on top. The heat from the poffertjes melts the butter, allowing the sugar to adhere beautifully, creating a simple yet delicious treat.
Creative Topping Ideas Beyond Powdered Sugar and Berries
However, don’t feel restricted to the classics. You can elevate your poffertjes experience with a variety of creative toppings. Consider drizzling them with infused syrups such as maple, caramel, or even a homemade fruit syrup. Chocolate sauce is another delicious option, bringing a decadent twist to this delightful snack.
Infused Syrups, Chocolate Sauce, Whipped Cream
If you’re feeling adventurous, whip up a batch of whipped cream to serve alongside your poffertjes. This adds a creamy texture that pairs perfectly with the fluffy pancakes. You can also experiment with infused syrups, such as lavender or cinnamon, to bring a unique flavor profile to your dish.
Seasonal Fruits and Toppings for Special Occasions
Seasonal fruits can also enhance your poffertjes. Fresh strawberries, blueberries, or sliced bananas add a refreshing touch, while a sprinkle of nuts can provide a delightful crunch. For special occasions, consider festive toppings like crushed peppermint for the holidays or edible flowers for a springtime gathering.
Nutritional Information
Overview of the Nutritional Profile of Poffertjes
Poffertjes are a delightful treat that can be enjoyed in moderation. Each poffertje contains a mix of carbohydrates, proteins, and fats, providing a balanced treat when accompanied by nutritious toppings. Typically, one poffertje contains about 50 calories, depending on the ingredients used.
Discussion of Portion Sizes and Serving Suggestions
When serving poffertjes, consider portion sizes; typically, 4-6 poffertjes per person makes a satisfying snack or dessert. Pair them with a protein-rich topping like Greek yogurt or serve them with a side of fruit to create a more balanced meal.
Considerations for Dietary Restrictions (e.g., Gluten-Free Options)
For those with dietary restrictions, poffertjes can be made gluten-free by substituting regular flour with a gluten-free blend. Ensure that your baking powder is also gluten-free. While the texture may differ slightly, gluten-free poffertjes can still be light and fluffy with the right adjustments.
Conclusion
Creating poffertjes at home not only brings joy to the cooking process but also a sense of accomplishment when you enjoy the fruits of your labor. The soft, fluffy texture paired with various toppings allows for endless experimentation, making poffertjes a versatile dish suitable for any occasion.
Don’t hesitate to explore different flavors and presentations; perhaps try adding spices or flavor extracts to your batter for a unique twist. Remember, poffertjes are not just a delightful treat; they hold cultural significance in Dutch cuisine, symbolizing warmth, hospitality, and shared moments around the table.
As you embark on your poffertjes-making journey, may you create delicious memories with family and friends, savoring each fluffy bite. Enjoy the process, get creative, and above all, celebrate the rich culinary heritage that poffertjes represent in home cooking traditions.