
Introduction
Rice Krispie treats have long been a beloved staple in the realm of dessert, known for their delightful simplicity and versatility. These no-bake confections have graced birthday parties, school events, and family gatherings for generations, making them a favorite among both kids and adults. But why stop at the classic version when you can elevate these treats to new heights? Enter the Irresistible Peanut Butter Rice Krispie Bars. This delightful twist introduces creamy peanut butter and decadent chocolate chips into the mix, creating a flavor profile that is both nostalgic and surprisingly indulgent.
The appeal of these bars lies not just in their taste but also in their straightforward preparation. With just a handful of ingredients and minimal steps, you can whip up a batch that will impress guests and satisfy your sweet tooth. Whether you’re looking for a quick snack, an easy dessert for a potluck, or a special treat for the kids, these Peanut Butter Rice Krispie Bars are sure to hit the mark.
The Allure of Peanut Butter Rice Krispie Bars
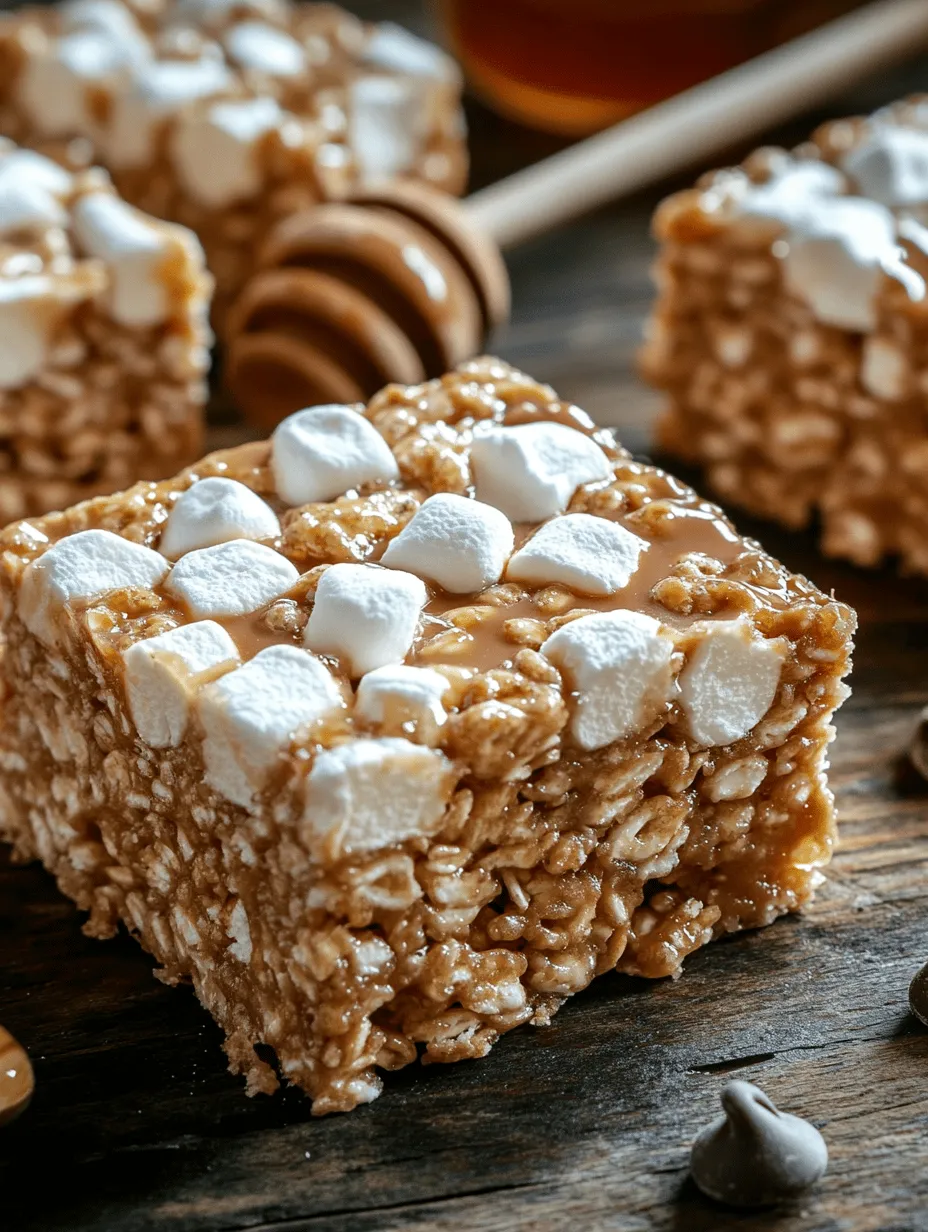
At the heart of the Irresistible Peanut Butter Rice Krispie Bars is a flavor profile that perfectly balances sweet, salty, and nutty elements. The base of crispy rice cereal provides that satisfying crunch we all love, while creamy peanut butter adds a rich, luxurious depth. When combined with gooey marshmallows, the result is a treat that offers a delightful chewiness that contrasts beautifully with the crunch of the cereal.
Imagine taking a bite and tasting the sweet and slightly salty notes of peanut butter mingling with the marshmallow’s sweetness. And just when you think it can’t get any better, the optional addition of chocolate chips brings a layer of decadence that takes these bars to a whole new level. The combination of flavors and textures creates an irresistible dessert that is sure to leave you coming back for more.
Beyond their deliciousness, Peanut Butter Rice Krispie Bars evoke a sense of nostalgia. Many of us have fond memories of making traditional Rice Krispie treats with family, and adding peanut butter brings those cherished moments into the present. These bars fit seamlessly into modern dessert culture, offering a beloved classic with a contemporary twist that appeals to all ages.
Ingredients Breakdown
Before diving into the preparation, let’s take a closer look at the ingredients that come together to create these delightful bars. Each component plays a vital role in achieving the perfect balance of flavor and texture.
Rice Krispies Cereal
At the core of our Peanut Butter Rice Krispie Bars is the iconic Rice Krispies cereal. Known for its signature crunch, this cereal serves as the foundation for our bars. Its light and airy texture lends itself well to creating a satisfying crunch that complements the gooey marshmallows and creamy peanut butter.
Creamy Peanut Butter
The star ingredient of this recipe, creamy peanut butter, not only adds richness but also infuses the bars with a delightful nuttiness. Its smooth consistency allows it to blend seamlessly with the other ingredients, ensuring that every bite is packed with that beloved peanut butter flavor. Whether you prefer smooth or crunchy peanut butter, both options work wonderfully in this recipe.
Mini Marshmallows
Mini marshmallows are essential for achieving that classic Rice Krispie treat texture. They provide sweetness and contribute to the gooeyness that makes these bars so irresistible. As the marshmallows melt, they bind the Rice Krispies together, creating a cohesive and chewy treat. Plus, their small size ensures an even distribution throughout the bars.
Honey or Maple Syrup
For a touch of natural sweetness, honey or maple syrup acts as both a sweetener and a binding agent. Not only do these options enhance the flavor profile, but they also help to hold the bars together. Their liquid form allows for easy mixing with the peanut butter and marshmallows, ensuring a smooth consistency.
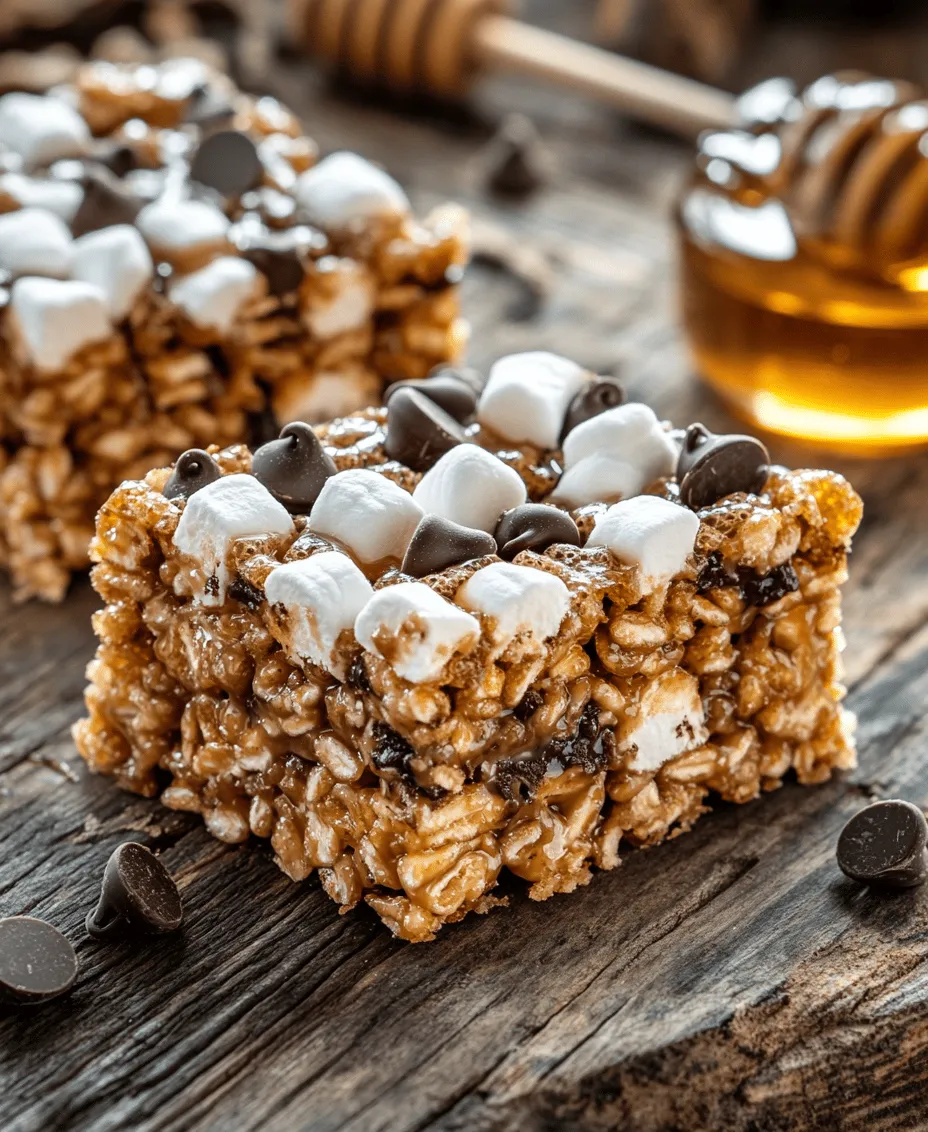
Optional Chocolate Chips
To elevate the flavor even further, consider adding optional chocolate chips. These little morsels introduce a rich chocolatey goodness that complements the peanut butter beautifully. You can choose semi-sweet, dark, or even milk chocolate chips, depending on your preference. Their melty texture adds an extra layer of indulgence, making these bars even more irresistible.
Vanilla Extract and Salt
A dash of vanilla extract enhances the overall taste profile, adding a warm and inviting aroma to the bars. Meanwhile, a pinch of salt helps to balance the sweetness and amplify the flavors, ensuring that each bite is perfectly seasoned. Together, these two ingredients round out the flavors and contribute to the overall deliciousness of the bars.
Preparation Steps Explained
Now that we’ve covered the ingredients, it’s time to dive into the preparation process. Creating these Irresistible Peanut Butter Rice Krispie Bars is straightforward, and with a few simple steps, you’ll have a delicious treat ready to enjoy.
Step 1: Preparing the Baking Dish
Before you begin mixing ingredients, it’s important to prepare your baking dish. Line an 8×8-inch or 9×9-inch square baking pan with parchment paper, leaving some overhang on the sides. This step is crucial for easy removal of the bars once they’re set. The parchment paper will prevent the bars from sticking to the pan, allowing you to lift them out effortlessly once they cool.
Step 2: Melting the Peanut Butter and Sweetener
In a medium saucepan over low heat, combine the creamy peanut butter and your choice of honey or maple syrup. Gently stir the mixture as it heats, allowing it to melt together until it reaches a smooth and creamy consistency. Be careful not to overheat, as you want to avoid burning the mixture. This process should take just a few minutes, and the result should be a velvety blend that will serve as the glue for your Rice Krispie bars.
As the peanut butter and sweetener melt together, you can also add a splash of vanilla extract and a pinch of salt for added flavor. Together, these ingredients create a harmonious blend that will enhance the overall taste of your bars.
Step 3: Combining the Ingredients
Once your peanut butter mixture is smooth and well combined, remove it from the heat. In a large mixing bowl, add the Rice Krispies and mini marshmallows. Pour the melted peanut butter mixture over the dry ingredients, and using a spatula or wooden spoon, gently fold everything together. Be careful not to crush the Rice Krispies; you want to maintain their crunch.
As you mix, ensure that all the Rice Krispies and marshmallows are evenly coated with the peanut butter mixture. If desired, now is the time to fold in the optional chocolate chips, allowing them to distribute evenly throughout the mixture. The warm peanut butter will slightly melt the chocolate chips, creating delightful pockets of gooey chocolate in each bar.
Step 4: Pressing the Mixture into the Baking Dish
Once everything is well combined, transfer the mixture to your prepared baking dish. Using your spatula or hands (greased with a little cooking spray to prevent sticking), press the mixture firmly into the pan. It’s important to pack it down tightly to ensure that the bars hold their shape once set. The more compact the mixture, the easier it will be to cut into bars later.
Step 5: Letting It Set
After pressing the mixture into the baking dish, allow it to cool at room temperature for about 30 minutes. If you’re in a hurry, you can place the dish in the refrigerator to expedite the cooling process. Allowing the bars to set is essential for achieving the right texture, ensuring they hold together when cut.
Stay tuned for the next part of the article, where we’ll explore additional tips for achieving the best results with your Peanut Butter Rice Krispie Bars and answer some common questions about this delightful treat.
Incorporating Marshmallows: Ensuring a Smooth and Gooey Mixture
To create the perfect Peanut Butter Rice Krispie Bars, start by incorporating marshmallows into your mixture. This step is crucial for achieving that classic gooey texture that binds everything together beautifully. Begin by adding your marshmallows to a large saucepan with the peanut butter over low heat. Stir continuously until the marshmallows have melted and combined thoroughly with the peanut butter, forming a smooth, homogenous mixture.
Keep the heat low to prevent the marshmallows from burning. If you prefer a more intense flavor, consider using flavored marshmallows, such as vanilla or caramel. The melted marshmallows should be soft but not overly runny; this consistency will help ensure that your Rice Krispie bars hold together well after they cool. A well-mixed marshmallow mixture is the heart of these bars, providing both flavor and that irresistible chewiness that makes them so enjoyable.
Mixing in the Rice Krispies: Techniques for Even Coating Without Crushing the Cereal
Once your marshmallow and peanut butter mixture is smooth, it’s time to incorporate the Rice Krispies. For this step, it is vital to maintain the integrity of the cereal to ensure your bars have the perfect crunch. Start by removing the saucepan from the heat and immediately add in the Rice Krispies.
Using a spatula or a wooden spoon, gently fold the cereal into the marshmallow mixture. It’s essential to use a folding motion rather than stirring vigorously, as this will help prevent the Rice Krispies from becoming crushed. Aim to coat each piece of cereal evenly without breaking them apart too much. This technique ensures that every bite of your bars has that delightful crunch, which is a hallmark of any good Rice Krispie treat.
Adding Flavor: The Role of Vanilla Extract and Optional Chocolate Chips in Enhancing Taste
To elevate the flavor profile of your Peanut Butter Rice Krispie Bars, consider adding a splash of vanilla extract. Just a teaspoon stirred into the melted marshmallow and peanut butter mixture can enhance the overall taste significantly. Vanilla complements the rich flavors of peanut butter and marshmallow, balancing the sweetness and adding depth.
If you’re a chocolate lover, now is the perfect time to mix in some chocolate chips. Semi-sweet or dark chocolate chips can add a delightful contrast to the sweetness of the bars while providing an extra layer of flavor. Fold in about a half cup of chocolate chips just before transferring the mixture to the dish. The warmth of the mixture will slightly melt the chips, creating delicious pockets of chocolate throughout the bars.
Transferring to the Dish: Tips for Pressing the Mixture Down for an Even Layer
Transferring your mixture into the dish is the next critical step. Line an 8×8 inch baking dish with parchment paper, leaving some overhang for easy removal later. Pour the Rice Krispie mixture into the prepared dish. To ensure an even layer, use a spatula to spread the mixture out as evenly as possible.
When pressing the mixture down, it’s important to use a firm but gentle hand. A great tip is to use a second piece of parchment paper to cover the mixture and then press down evenly with your hands or a flat-bottomed measuring cup. This method not only prevents sticking but also helps create a compact layer that will hold together well once cooled. Aim for an even thickness throughout the dish, as this will ensure uniform bars when you cut them.
Cooling and Setting: Optimal Cooling Methods for Best Results
After pressing the mixture into the dish, the next step is to allow it to cool and set properly. For best results, let the bars cool at room temperature for at least 30 minutes. If you’re in a hurry, you can speed up the process by placing the dish in the refrigerator for about 15 to 20 minutes. Cooling the bars in the fridge will help them set more quickly and make cutting them easier.
Once they are cooled and firm to the touch, you can lift them out of the dish using the parchment overhang. Transfer them to a cutting board and slice them into squares or rectangles, depending on your preference. The bars should hold their shape well, making them perfect for packing into lunchboxes or serving at gatherings.
Nutritional Value and Benefits
Understanding the nutritional value of your Peanut Butter Rice Krispie Bars can help you appreciate their benefits. Each bar contains approximately 150 calories, depending on the size and the specific ingredients used. The primary ingredients contribute to a well-rounded nutritional profile.
Peanut butter, a key ingredient, offers healthy fats and protein, making these bars a satisfying treat. The protein content helps sustain energy levels, while the healthy fats support heart health and keep you feeling full longer. Additionally, using honey or maple syrup as natural sweeteners provides a source of antioxidants and minerals, making these bars not just delicious but also a better choice than many store-bought snacks.
Serving Suggestions and Variations
Peanut Butter Rice Krispie Bars are incredibly versatile and can be served in various ways. They make an excellent addition to parties, as a quick snack during movie nights, or as a sweet treat added to lunchboxes. Their chewy texture and sweet flavor make them a favorite among kids and adults alike.
For those looking to get creative, consider the following variations:
– Nut Butter Substitutes: Swap peanut butter for almond or cashew butter for a different flavor profile. Each nut butter has its unique taste and nutritional benefits, allowing you to customize your bars to suit your preferences.
– Add-Ins: Incorporate dried fruits such as cranberries or raisins, or toss in some chopped nuts for added crunch and flavor. These ingredients can enhance the nutritional value and make the bars even more satisfying.
– Gluten-Free Option: To make your Peanut Butter Rice Krispie Bars gluten-free, simply ensure that you use gluten-free Rice Krispies. This way, everyone can enjoy this delightful treat without concern.
Storage and Shelf Life
To maintain the freshness of your Peanut Butter Rice Krispie Bars, proper storage is key. Store them in an airtight container at room temperature for up to one week. If you live in a particularly warm climate, it’s advisable to store them in the refrigerator to prevent them from becoming too soft or sticky.
For longer storage, you can freeze the bars. Simply wrap each bar individually in plastic wrap and then place them in a freezer-safe container. This way, they can last for up to three months! When you’re ready to enjoy them, simply thaw them at room temperature for a few hours or microwave them for a few seconds to bring back their delightful chewiness.
Conclusion
In summary, Peanut Butter Rice Krispie Bars are not only simple to make but also incredibly delicious and versatile. With just a few basic ingredients and some easy techniques, you can create a delightful treat that’s perfect for any occasion. The balance of flavors, the satisfying crunch of the Rice Krispies, and the rich, creamy peanut butter come together in a way that is sure to impress.
Whether you serve them at a gathering, pack them in a lunchbox, or enjoy them as an after-dinner treat, these bars are bound to be a hit. We encourage you to try making these delightful bars at home. With a bit of creativity and a few personal touches, you can customize them to suit your taste and dietary needs. So gather your ingredients, follow the steps, and enjoy the irresistible goodness of Peanut Butter Rice Krispie Bars!