Introduction
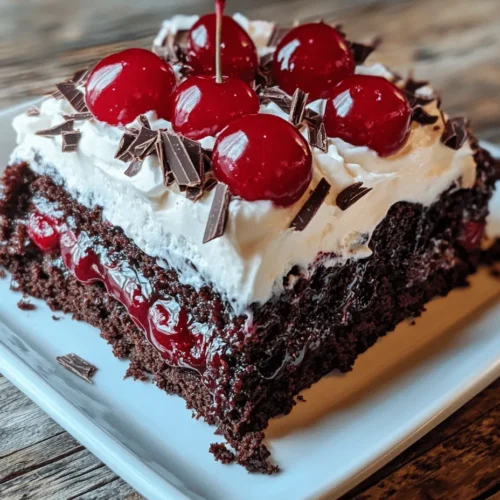
The Black Forest Cake, or Schwarzwälder Kirschtorte as it is known in its native Germany, is a dessert that has captured the hearts of many across the globe. Its rich history dates back to the early 20th century in the Black Forest region of Germany, where it was first created. This iconic cake is much more than just a sweet treat; it symbolizes celebration and indulgence, often gracing the tables of birthdays, weddings, and festive gatherings. With its layers of rich chocolate cake, luscious cherry filling, and fluffy whipped cream, the Black Forest Cake represents a perfect harmony of flavors and textures that leave a lasting impression on anyone lucky enough to indulge in a slice.
The allure of making this classic dessert from scratch in your own kitchen lies not just in the satisfaction of baking but also in the opportunity to customize and perfect each element. Imagine the aroma of freshly baked chocolate cake wafting through your home, the vibrant color of cherries nestled between layers, and the inviting sight of a cake adorned with whipped cream. Making a Black Forest Cake at home allows you to control the quality of ingredients, ensuring that each bite is as decadent as it should be.
Whether you are a seasoned baker or a novice in the kitchen, this recipe will guide you through the steps to create a truly decadent Black Forest Cake that rivals any bakery. Let’s dive into the essential components that make up this beloved dessert and get started on your baking adventure.
Understanding the Components of Black Forest Cake
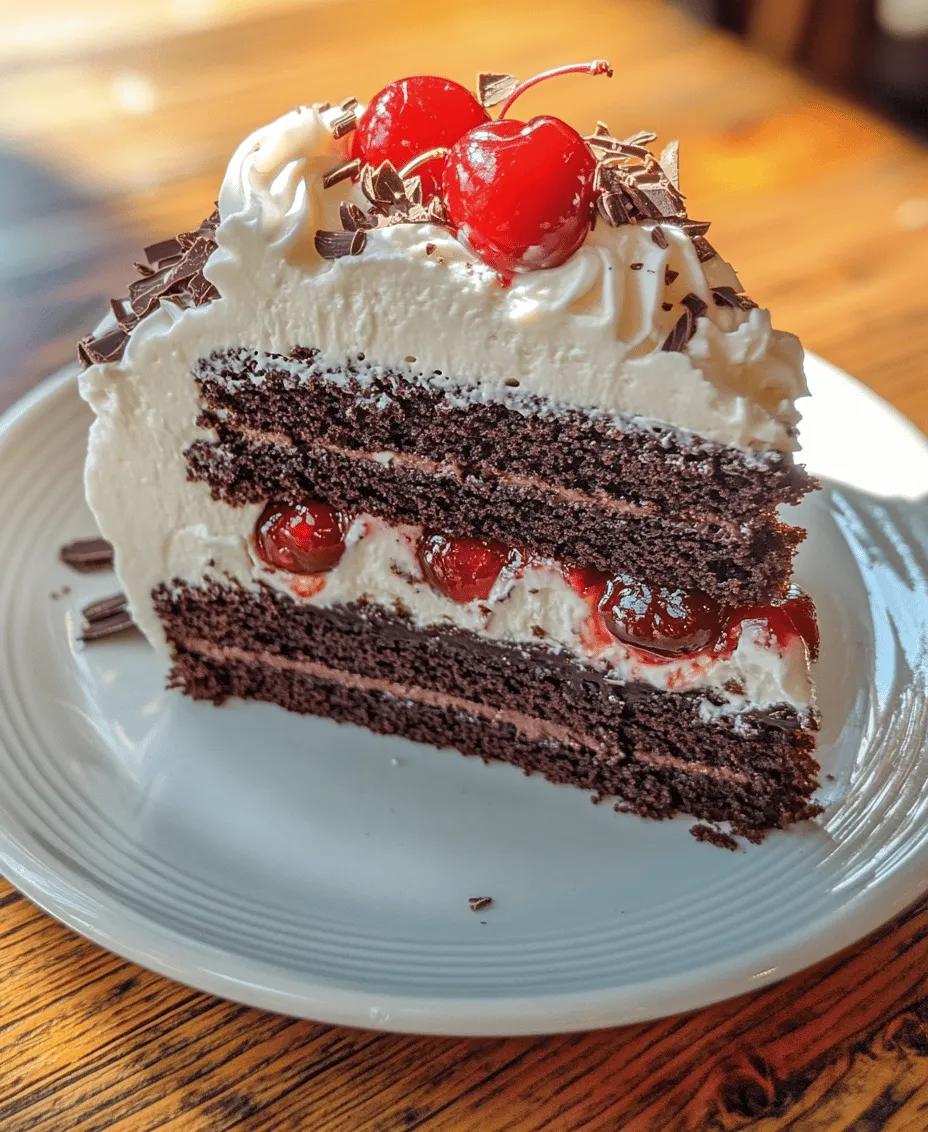
To create the perfect Black Forest Cake, it is essential to understand the three key components: Chocolate Cake, Cherry Filling, and Whipped Cream. Each element plays a vital role in achieving the cake’s signature flavor profile and overall texture.
Chocolate Cake
The foundation of any Black Forest Cake is its rich chocolate cake. This moist and fluffy chocolate layer serves as the canvas for the other flavors. The cake is made from high-quality cocoa powder and often incorporates both baking soda and baking powder to achieve the right lift and texture. The secret to a truly decadent chocolate cake lies in the use of boiling water, which enhances the cocoa’s flavor and helps create a moist crumb.
Cherry Filling
The cherry filling is another critical aspect of the Black Forest Cake. Traditionally, this filling is made with Morello cherries, known for their tartness and deep color. These cherries provide a delightful contrast to the sweetness of the chocolate cake and whipped cream. When preparing the cherry filling, it is essential to cook the cherries down with a bit of sugar and cornstarch, which acts as a thickening agent. This ensures that the filling holds its shape when layered between the cakes.
Whipped Cream
Finally, adding a generous layer of whipped cream brings everything together. The light, airy texture of whipped cream balances the richness of the chocolate and the tartness of the cherries. Using heavy cream and ensuring it is properly whipped will yield the best results. The whipped cream can be flavored with a hint of vanilla or even a splash of Kirsch (cherry schnapps), which adds an extra layer of complexity to the cake.
By focusing on high-quality ingredients for each of these components, you can create a Black Forest Cake that boasts outstanding flavor and texture.
Creating the Chocolate Cake
Now that we have a clear understanding of the components of the Black Forest Cake, let’s focus on creating the chocolate cake itself. Below is a detailed explanation of the ingredients needed, along with step-by-step preparation instructions.
Ingredients for Chocolate Cake
1. All-Purpose Flour: 1 ¾ cups
2. Granulated Sugar: 2 cups
3. Unsweetened Cocoa Powder: ¾ cup
4. Baking Powder: 1 ½ teaspoons
5. Baking Soda: 1 ½ teaspoons
6. Salt: 1 teaspoon
7. Vegetable Oil: ½ cup
8. Eggs: 2 large
9. Whole Milk: 1 cup
10. Vanilla Extract: 2 teaspoons
11. Boiling Water: 1 cup
Step-by-Step Preparation Process
1. Preheat the Oven: Start by preheating your oven to 350°F (175°C). This ensures that the cake bakes evenly.
2. Prepare the Cake Pans: Grease and flour two 9-inch round cake pans. This will prevent the cakes from sticking, allowing for easy removal once baked.
3. Combine Dry Ingredients: In a large mixing bowl, sift together the all-purpose flour, granulated sugar, cocoa powder, baking powder, baking soda, and salt. Whisk these dry ingredients until well combined.
4. Add Wet Ingredients: To the dry mixture, add the vegetable oil, eggs, milk, and vanilla extract. Using an electric mixer, mix on medium speed for about 2 minutes until the batter is well combined and smooth.
5. Incorporate Boiling Water: Carefully stir in the boiling water. This step is crucial as it enhances the cocoa flavor and helps create a moist cake. The batter will be relatively thin, but that’s perfectly normal.
6. Bake the Cakes: Divide the batter evenly between the prepared cake pans. Bake in the preheated oven for 30-35 minutes. To check for doneness, insert a toothpick into the center of the cakes; it should come out clean.
7. Cool the Cakes: Once baked, remove the cakes from the oven and let them cool in the pans for about 10 minutes. Then, transfer them to a wire rack to cool completely. This step is essential to prevent the layers from becoming soggy.
Importance of Proper Mixing Techniques
When preparing the chocolate cake batter, proper mixing techniques are vital. Mixing too much can lead to a dense cake, while under-mixing can result in uneven textures. Aim for a smooth batter without lumps, and ensure all ingredients are thoroughly incorporated.
The Significance of Boiling Water
The addition of boiling water is a game-changer in this recipe. Not only does it intensify the chocolate flavor, but it also helps to create a moist cake that is less prone to drying out. The hot water activates the cocoa powder, allowing it to bloom and release its full flavor potential. This step is crucial for achieving the rich chocolate taste that makes Black Forest Cake so special.
Tips for Ensuring Even Baking
To ensure that your cakes bake evenly, it’s important to rotate them halfway through the baking time. Additionally, place the cake pans in the center of the oven, away from the walls. This will help maintain a consistent temperature around them, resulting in a perfectly baked cake.
Once your cakes are baked and cooled, you will be ready to move on to the next essential component of the Black Forest Cake: the cherry filling.
Crafting the Cherry Filling
The cherry filling is what elevates the Black Forest Cake from a simple chocolate cake to an exquisite dessert. Below are the steps to create a delicious cherry filling that will perfectly complement your chocolate layers.
Choosing the Right Cherries
When it comes to selecting cherries for your filling, Morello cherries are the traditional choice. Known for their tartness and vibrant color, they provide an excellent balance to the rich chocolate cake. If fresh Morello cherries are not available, you can opt for frozen or jarred cherries, but be sure to choose high-quality options for the best flavor.
Ingredients for Cherry Filling
1. Morello Cherries: 2 cups (pitted and chopped)
2. Granulated Sugar: ½ cup (adjust based on the tartness of the cherries)
3. Cornstarch: 2 tablespoons (for thickening)
4. Cherry Juice or Water: ½ cup
5. Vanilla Extract: 1 teaspoon (optional)
6. Kirsch (Cherry Schnapps): 1 tablespoon (optional, for added flavor)
Step-by-Step Instructions
1. Prepare the Cherries: If using fresh cherries, wash, pit, and chop them. If using frozen cherries, allow them to thaw and drain any excess liquid.
2. Combine Ingredients: In a medium saucepan, combine the cherries, granulated sugar, cornstarch, and cherry juice (or water). If desired, add the vanilla extract and Kirsch.
3. Cook the Filling: Over medium heat, bring the mixture to a gentle boil. Stir continuously to prevent sticking. As the mixture heats up, the cherries will release their juices, and the cornstarch will thicken the filling. Cook for about 5-7 minutes until the mixture is bubbly and thickened.
4. Cool the Filling: Remove the saucepan from heat and let the cherry filling cool completely. This will help it set further and make it easier to layer in the cake.
The Role of Cornstarch as a Thickening Agent
Cornstarch is a critical ingredient in the cherry filling because it helps to create a thick and stable filling that won’t run out when the cake layers are assembled. By mixing it with sugar before adding it to the fruit, you ensure an even distribution, preventing clumping. When cooked, the cornstarch will thicken the liquid released by the cherries, resulting in a luscious filling that enhances the overall texture of the cake.
—
With these foundational components and steps clearly outlined, you are well on your way to creating a show-stopping Black Forest Cake. In the subsequent sections of this article, we will cover the assembly of the cake, the creation of the whipped cream topping, and some expert tips for serving and storing your masterpiece. Stay tuned for the delicious conclusion to this baking adventure!
Balancing Sweetness and Acidity with Lemon Juice
When crafting a decadent Black Forest Cake, achieving the right balance of flavors is crucial. One ingredient that can significantly enhance this balance is lemon juice. The acidity of the lemon juice cuts through the richness of the chocolate and cream, adding a refreshing note that elevates the overall flavor profile. To incorporate lemon juice effectively, consider adding a tablespoon to your cherry filling or even a few drops to the whipped cream. This subtle addition will help to brighten the flavors, ensuring that the cake is not overly sweet and has a refreshing finish.
Suggestions for Variations
While traditional Black Forest Cake is undeniably delicious, experimenting with variations can be a delightful way to personalize this classic dessert. If you have access to fresh cherries in season, using them instead of jarred cherries can elevate the cake’s flavor. Fresh cherries provide a burst of juiciness that complements the chocolate perfectly. Simply pit and halve the cherries, then layer them between the cake layers or use them as a topping.
Another variation to consider is the use of different chocolate types. Dark chocolate lends a rich flavor, but for a lighter take, try using semi-sweet or even white chocolate. Additionally, for a nutty twist, you can incorporate finely chopped nuts, such as hazelnuts or almonds, into the layers or as a decorative topping. Each of these variations can add unique character to your Black Forest Cake while retaining its classic charm.
Whipping Up the Cream
Importance of Using Heavy Whipping Cream
The cream is a key component of Black Forest Cake, making it essential to use the right type. Heavy whipping cream, with its higher fat content (around 36% fat), whips beautifully and holds its shape longer than lighter creams. This is crucial for maintaining the integrity of your cake layers and providing that luscious mouthfeel that everyone loves. Opt for fresh, high-quality heavy whipping cream for best results, as it will contribute to a richer flavor and creamier texture.
Detailed Instructions on How to Whip Cream to the Ideal Consistency
Whipping cream may seem straightforward, but achieving the perfect consistency requires attention to detail. Here’s how to do it:
1. Chill Your Equipment: Start by chilling your mixing bowl and beaters or whisk in the freezer for about 15-20 minutes. Cold equipment helps the cream whip faster and increases its volume.
2. Pour the Cream: Measure out the desired amount of heavy whipping cream and pour it into the chilled bowl. For a standard Black Forest Cake, around 2 cups of cream should suffice.
3. Begin Whipping: Using an electric mixer on medium speed, begin to whip the cream. As it starts to thicken, you can gradually increase the speed to high.
4. Add Sugar and Flavoring: Once soft peaks form, add powdered sugar to taste (about 2-4 tablespoons), along with any flavorings such as vanilla extract or almond extract. Continue whipping until stiff peaks form, being careful not to over-whip, as this can lead to a grainy texture.
5. Check the Consistency: The cream should be thick enough to hold its shape but still smooth and spreadable. To test, lift the whisk or beaters; the peaks should stand tall and hold their shape.
Tips on Flavoring the Whipped Cream and Incorporating It into the Cake
Flavoring your whipped cream can enhance the overall taste of the Black Forest Cake. For a classic touch, add a teaspoon of vanilla extract or a splash of cherry liqueur like Kirsch to the cream before whipping. This will imbue the cream with subtle undertones that complement the chocolate and cherries beautifully.
When incorporating the whipped cream into the cake, do so gently to maintain its airy texture. Use a spatula to spread a layer of whipped cream evenly over the first chocolate cake layer, then add a layer of cherry filling. Repeat this process with the remaining layers, ensuring that each layer is generously filled with cream and cherries.
Assembling the Black Forest Cake
Step-by-Step Guide to Assembling the Cake Layers
1. Prepare the Layers: Once the chocolate cake layers are completely cooled, level them if necessary to ensure even stacking.
2. Placement: Place the first layer of cake on a serving plate or cake stand. Ensure that the top is facing up for a smooth surface.
3. Spread the Whipped Cream: Using an offset spatula, spread a generous layer of whipped cream over the surface of the cake. Make sure to reach the edges for an even appearance.
4. Add Cherry Filling: Spoon a layer of cherry filling over the whipped cream, distributing it evenly.
5. Repeat Layers: Add the second layer of chocolate cake on top of the cherry filling and repeat the process—whipped cream, cherry filling, and the next cake layer. Continue until all layers are stacked.
Techniques for Spreading Filling and Cream Evenly
To achieve a professional-looking cake, evenly spread the whipped cream and cherry filling. Here are a few techniques:
– Offset Spatula: This tool is ideal for spreading frosting and cream smoothly. Hold it at a slight angle and use a sweeping motion to cover the surface evenly.
– Cardboard Round: When assembling, place a cardboard cake round between the cake and the plate. This makes transferring the cake easier and helps keep the presentation clean.
– Turntable: If you have a cake turntable, use it to rotate the cake while you spread the cream. This allows for a more controlled and even application.
Tips for Securing the Cake Layers and Preventing Sliding
To prevent your cake layers from sliding apart, here are some helpful tips:
– Chill Between Layers: After stacking a couple of layers, chill the cake in the refrigerator for about 20-30 minutes. This helps the cream firm up and hold the layers in place.
– Use a Cake Board: If you’re transporting the cake or preparing it in advance, consider using a cake board under the bottom layer. This provides stability and makes it easier to move.
– Support with Straws or Dowels: For larger cakes, insert straws or dowels through the layers to provide additional support and prevent shifting.
Suggestions for Decoration
Decorating your Black Forest Cake is where you can truly showcase your creativity. Here are some suggestions:
– Chocolate Shavings: Use a vegetable peeler to create chocolate shavings from a block of chocolate, and sprinkle them generously over the top and sides of the cake.
– Fresh Cherries: Top the cake with whole fresh cherries for a vibrant contrast. You can also place a few cherries on the sides for an eye-catching effect.
– Whipped Cream Rosettes: Pipe additional whipped cream onto the top of the cake in decorative rosettes or swirls for a professional finish.
Serving Suggestions
Ideal Serving Temperature and Presentation Ideas
For the best flavor and texture, serve your Black Forest Cake chilled but not too cold. The cream should be slightly softened, allowing for a luscious mouthfeel. When presenting the cake, consider using a cake stand to elevate its appearance. A simple garnish of chocolate shavings and fresh cherries on a decorative plate can make a stunning presentation.
Pairing Recommendations
To enhance your dessert experience, consider pairing your slice of Black Forest Cake with complementary beverages. A rich, dark coffee balances the sweetness of the cake, while a glass of dessert wine, such as a sweet Riesling or a cherry-infused liqueur, can elevate the flavors even further. For a cozy touch, serve with a dollop of unsweetened whipped cream on the side.
Ways to Elevate the Dessert Experience for Special Occasions
To make your Black Forest Cake even more special for celebrations, consider these ideas:
– Layer of Surprise: Hide a layer of chocolate ganache or a layer of mousse between the cake layers for added decadence.
– Themed Decor: For birthday parties or special events, customize the cake’s decorations to match the theme, using colored frosting or themed toppers.
– Personal Touch: Add a personalized message on the cake using piping gel or frosting, making it a memorable centerpiece for any gathering.
Conclusion
Creating a homemade Black Forest Cake is not just about baking; it’s an experience filled with joy and satisfaction. The process of layering rich chocolate, luscious whipped cream, and sweet cherries culminates in a dessert that is a feast for the senses. Whether enjoyed at a family gathering or a festive celebration, this cake resonates with timeless appeal and creates lasting memories.
As you slice into your creation, savor the flavors and share the delight with family and friends. This classic dessert is sure to be a hit, evoking smiles and compliments. Embrace your culinary skills and bring the joy of a homemade Black Forest Cake to your table, where it can shine as the centerpiece of your celebrations and gatherings for years to come.