Introduction
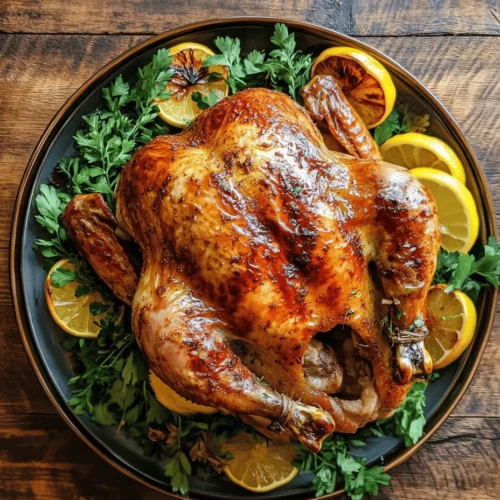
When it comes to culinary masterpieces, few dishes can match the succulence and flavor of a perfectly roasted chicken. This Cider Brined Roast Chicken recipe takes the beloved classic to new heights with a unique brining technique that infuses the meat with a delightful sweet and savory flavor profile. This dish not only serves as a fantastic centerpiece for family dinners but also shines during special occasions, ensuring that every bite is a memorable one.
Brining is a time-honored technique that enhances the moisture and flavor of meats, making it a go-to method for achieving juicy results. In this article, we will explore the art of brining, particularly focusing on the benefits of using apple cider as a key ingredient. We will also provide you with a step-by-step guide to crafting a beautifully roasted chicken that is not only delicious but also visually appealing, making it perfect for impressing your guests.
Understanding the Brining Process
The Science Behind Brining
At its core, brining is a method that involves soaking meat in a solution of saltwater, which can include various flavoring agents. The science behind this technique revolves around the process of osmosis. When meat is submerged in a brine solution, the salt draws moisture into the meat cells. This action not only enhances moisture retention but also helps to tenderize the meat, resulting in a juicier and more flavorful final product.
During the brining process, the salt in the solution breaks down some of the proteins in the meat, allowing them to absorb the liquid. As the chicken absorbs the brine, it takes on the flavors from the added ingredients, creating a depth of taste that is difficult to achieve through traditional seasoning methods alone. When you bite into a piece of cider brined chicken, you’ll discover a harmonious blend of flavors that elevates your dish far beyond ordinary roasted poultry.
Benefits of Cider Brining
Apple cider plays a pivotal role in enhancing the flavor of the brine for our roast chicken. Not only does it impart a subtle sweetness and fruity aroma, but it also contributes to the overall complexity of flavors. Additionally, apple cider vinegar, which is often used in conjunction with apple cider, boasts several health benefits, including potential positive effects on digestion and blood sugar regulation.
When comparing traditional brining techniques to cider brining, the latter offers a unique twist that adds a touch of seasonal charm to your roast. Traditional brines primarily rely on water, salt, and spices, whereas cider brining infuses the meat with the tartness and sweetness of apples, making it a delightful choice for autumn gatherings or holiday feasts. The result is a roast chicken that not only tastes incredible but also celebrates the rich flavors of the fall harvest.
Ingredients Breakdown
To create the perfect Cider Brined Roast Chicken, you will need several essential ingredients, each playing a key role in the overall flavor and texture of the dish. Here’s a breakdown of what you’ll need and why each component is important:
Whole Chicken
The star of this recipe is, of course, the whole chicken. When selecting a chicken, pay attention to the size and quality. Opt for a high-quality bird, preferably organic or free-range, as it will have a better flavor and texture. The ideal weight for roasting is between 3.5 to 4.5 pounds, as this size will cook evenly and yield juicy meat.
Apple Cider
Choosing the right apple cider is crucial for achieving optimal flavor. Look for unfiltered, natural apple cider without added sugars or preservatives. This type of cider will provide a fresh apple flavor that enhances the brining process. If you prefer a stronger apple taste, you can also consider adding a splash of apple cider vinegar to the brine.
Kosher Salt and Brown Sugar
Kosher salt is a staple in brining recipes due to its coarse texture, which allows for even distribution and easy absorption. It’s essential for creating the brine and ensuring that the chicken absorbs the necessary flavors. Brown sugar, on the other hand, adds a touch of sweetness, balancing the saltiness and helping to create a beautifully caramelized skin when roasted.
Fresh Herbs
To elevate the flavor profile even further, fresh herbs such as thyme and rosemary are incorporated into the brine. These aromatic herbs complement the apple cider beautifully and provide an earthy undertone to the overall dish. Fresh herbs not only enhance flavor but also add a fragrant aroma that will fill your kitchen as the chicken roasts.
Optional Ingredients and Variations
While the above ingredients are fundamental to the Cider Brined Roast Chicken recipe, there are plenty of opportunities to personalize it to your taste. For example, you might consider adding whole garlic cloves, crushed peppercorns, or even citrus slices to the brine for an extra burst of flavor. You can also experiment with different herbs or spices to make the recipe your own.
Step-by-Step Cooking Instructions
Preparing the Brine
Now that we’ve covered the essential ingredients, it’s time to prepare the brine. Begin by gathering a large mixing bowl or pot that can accommodate the entire chicken comfortably.
1. Combine Ingredients: In your mixing bowl, pour in 4 cups of apple cider, followed by ¾ cup of kosher salt and ½ cup of brown sugar. Stir the mixture well until the salt and sugar are completely dissolved.
2. Add Fresh Herbs: Add a handful of fresh thyme and rosemary to the brine. This will infuse the mixture with aromatic flavors right from the start.
3. Cool the Brine: Before submerging the chicken, it is crucial to cool the brine to ensure safe preparation. You can achieve this by adding ice cubes directly to the brine or placing it in the refrigerator for about 30 minutes. The brine should be chilled but not frozen when you’re ready to use it.
Brining the Chicken
Once the brine is cool, it’s time to brine the chicken. This step is essential in ensuring that your roast turns out juicy and flavorful.
1. Prepare the Chicken: Rinse the whole chicken under cold water and pat it dry with paper towels. This ensures that the brine can effectively penetrate the meat.
2. Submerge the Chicken: Place the chicken in the bowl or pot with the cooled brine, making sure it is fully submerged. If necessary, weigh the chicken down with a plate or a clean, heavy object to keep it submerged.
3. Brining Duration: Cover the bowl or pot with plastic wrap and place it in the refrigerator. For optimal results, allow the chicken to brine for at least 4 hours, although overnight brining (up to 12 hours) is recommended for maximum flavor infusion.
As the chicken brines, it will absorb the flavors of the apple cider, salt, and herbs, transforming it into a flavorful masterpiece ready for roasting.
In the next part of this article, we will continue with the roasting instructions and tips for achieving the perfect Cider Brined Roast Chicken, ensuring that every aspect of this dish is thoroughly covered for your cooking pleasure. Stay tuned for more delicious insights and culinary adventures!
Best Practices for Submerging the Chicken
When brining your chicken, ensuring complete submersion is crucial for achieving optimal flavor and moisture. Here are some best practices:
1. Use a Brining Bag or Container: A large resealable plastic bag or a food-safe container is ideal for brining. If using a bag, ensure it is strong enough to hold the liquid and the chicken without leaking. If you choose a container, make sure it’s large enough to comfortably fit the chicken and the brine.
2. Keep it Cool: Always brine the chicken in the refrigerator or in a cooler with ice packs. Keeping the chicken cold while it brines prevents bacterial growth, ensuring food safety.
3. Remove Air from the Bag: If you are using a bag, try to remove as much air as possible before sealing it. This helps the brine to fully cover the chicken and allows for better absorption of flavors.
4. Weight the Chicken Down: If the chicken tends to float, consider placing a plate or another heavy object on top of it to keep it submerged in the brine. This ensures every part of the chicken absorbs the brine, enhancing the flavor throughout.
Recommended Times for Brining: How Long is Too Long?
Brining time is a critical factor in achieving the perfect cider-brined roast chicken. Here’s a guideline to help you determine how long to brine:
– Minimum Time: For effective flavor infusion, brining should last at least 4 hours. This allows the chicken to absorb enough flavor without becoming overly salty.
– Optimal Time: Ideally, a brining time of 12 to 24 hours yields the best results. This timeframe allows the flavors to penetrate deeply into the meat, ensuring a juicier chicken.
– Maximum Time: Avoid brining for more than 24 hours. Extended brining can lead to overly salty chicken, which detracts from the overall taste. If you plan to brine longer, consider diluting the brine or reducing the salt content.
Preparing for Roasting
Importance of Rinsing and Drying the Chicken
Once the brining process is complete, it’s essential to rinse the chicken thoroughly under cold water. Rinsing removes excess salt from the surface, preventing the chicken from becoming too salty during roasting.
After rinsing, pat the chicken dry with paper towels. Moisture on the skin can hinder browning and crisping during the roasting process, so thorough drying is key to achieving a beautifully crispy skin.
How Resting at Room Temperature Affects Cooking Results
Before roasting, let the chicken rest at room temperature for about 30 to 60 minutes. Bringing the chicken to room temperature ensures even cooking throughout. A cold chicken from the refrigerator will take longer to cook, potentially resulting in uneven doneness.
Allowing it to rest also helps in retaining the juices, leading to a more succulent final product.
Roasting the Chicken
Tips for Preheating the Oven Correctly
Preheat your oven to 425°F (220°C) at least 30 minutes before placing the chicken inside. This high temperature will help achieve a crispy skin while cooking the chicken evenly. An accurately preheated oven ensures that the chicken starts cooking immediately, locking in flavors and moisture.
Detailed Roasting Instructions: Temperature Control and Timing
1. Prepare the Roasting Pan: Place a rack in a roasting pan to elevate the chicken. This allows heat to circulate around the bird, promoting even cooking.
2. Season the Chicken: Before placing the chicken in the oven, consider adding a layer of seasoning. A simple rub of olive oil, salt, and pepper on the skin can enhance the flavor and promote browning.
3. Roast the Chicken: Place the chicken on the rack breast side up and roast it in the preheated oven. The general rule of thumb is to roast for about 20 minutes per pound. For a standard 4-5 pound chicken, this means a roasting time of approximately 1 hour and 20 minutes to 1 hour and 40 minutes.
4. Monitor Internal Temperature: Use a meat thermometer to check the internal temperature of the chicken. The thickest part of the thigh should reach an internal temperature of 165°F (74°C) to ensure the chicken is fully cooked.
The Importance of Basting: How to Achieve Crispy Skin
Basting is a technique that involves spooning or brushing the pan juices over the chicken during roasting. This not only adds flavor but also helps in achieving that coveted crispy skin. Here’s how to do it effectively:
– Baste Midway: After the first 30 minutes of roasting, baste the chicken with its juices. This will help keep the skin moist and flavorful.
– Repeat Every 20 Minutes: Continue to baste every 20 minutes after that. If the juices are running low, you can add a bit of broth or water to the pan to create more liquid for basting.
– Finish with High Heat: In the last 10-15 minutes of roasting, consider increasing the oven temperature to 450°F (232°C) for a final blast of heat. This will help to achieve an even crispier skin.
Resting and Serving
Explanation of Why Resting the Chicken is Crucial for Moisture Retention
Once the chicken has reached the desired internal temperature, remove it from the oven and let it rest for at least 15-20 minutes before carving. This resting period allows the juices to redistribute throughout the meat, preventing them from spilling out when you cut into the chicken.
A well-rested chicken will be much juicier and more flavorful, providing an excellent dining experience for you and your guests.
Carving Methods for Presentation and Ease of Serving
Carving a chicken can be intimidating, but with a few simple steps, you can achieve a beautifully presented dish:
1. Use a Sharp Knife: Ensure your carving knife is sharp for clean cuts.
2. Remove the Legs First: Start by cutting through the skin that connects the leg to the body, then pull the leg away from the body to expose the joint. Cut through the joint to remove the leg.
3. Separate the Thigh and Drumstick: If desired, you can separate the thigh from the drumstick by cutting through the joint.
4. Carve the Breast Meat: Make long, even slices down each side of the breastbone to carve the breast meat. Aim for uniform pieces for an appealing presentation.
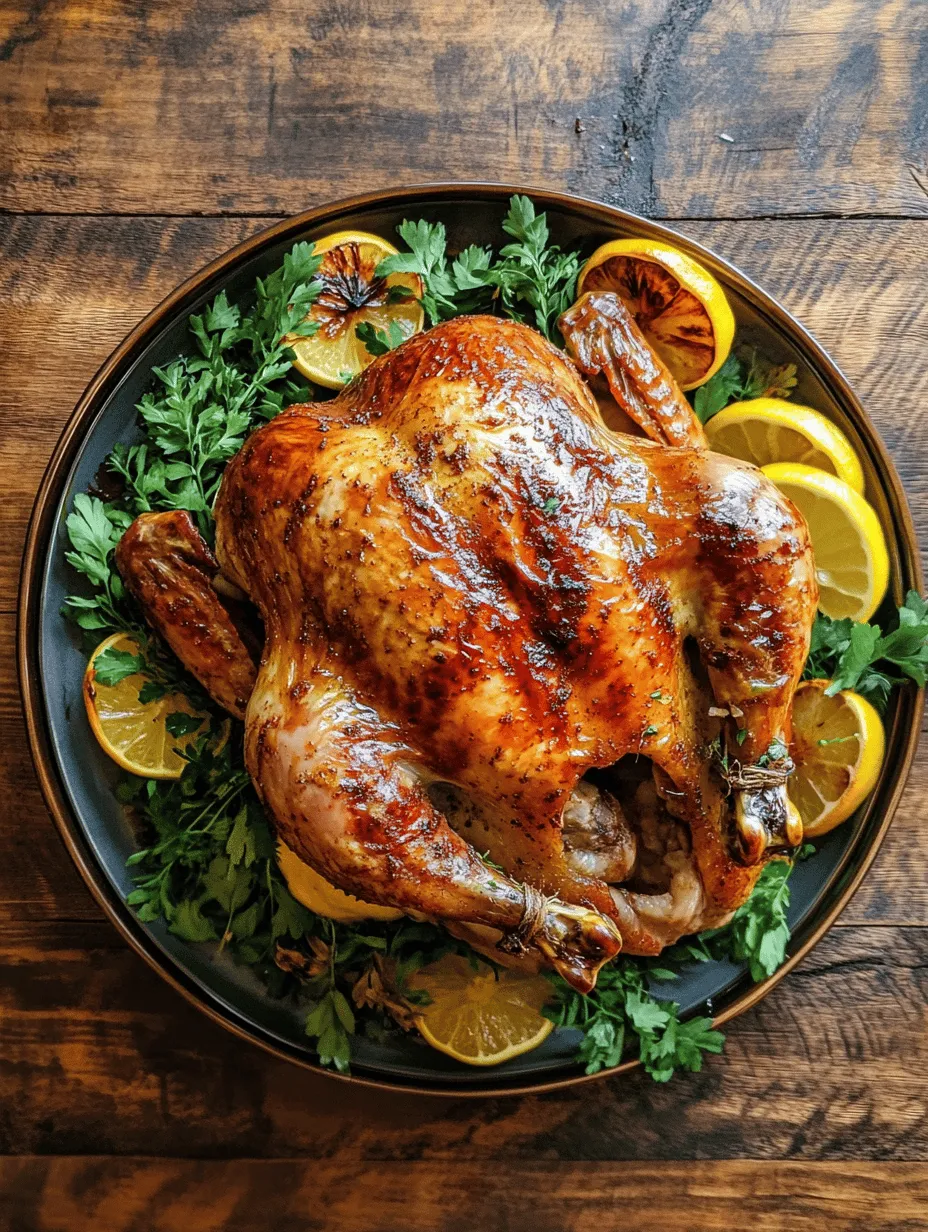
5. Arrange on a Platter: Lay the carved meat on a serving platter, arranging the legs and thighs around the breast for an attractive display.
Flavor Pairings and Side Dishes
Complementary Sides for Cider Brined Roast Chicken
The sweet and savory notes of cider brined roast chicken pair beautifully with a variety of side dishes. Here are some classic options to enhance your meal:
1. Roasted Vegetables: Seasonal roasted vegetables such as carrots, Brussels sprouts, and root vegetables are excellent choices. Toss them with olive oil, salt, and pepper, and roast them alongside your chicken for a delightful combination of flavors.
2. Mashed Potatoes: Creamy mashed potatoes are a comforting side that complements the savory chicken. Consider variations like garlic mashed potatoes or adding herbs like chives for an extra flavor boost.
3. Green Salads: A vibrant green salad with a tangy vinaigrette can balance the richness of the chicken. Include ingredients like mixed greens, sliced apples, walnuts, and a light citrus dressing to enhance the fresh flavors.
Beverage Pairings
For the perfect beverage to accompany your cider brined roast chicken, consider the following options:
1. Cider: A crisp, dry cider echoes the flavors of the brine, enhancing the meal’s overall experience. Choose a local craft cider for a unique touch.
2. White Wine: A fruity Sauvignon Blanc or a buttery Chardonnay can complement the chicken’s flavors beautifully. These wines enhance the dish without overwhelming its delicate taste.
3. Non-Alcoholic Options: For a non-alcoholic pairing, consider sparkling apple cider or a refreshing herbal iced tea. Both options will provide a delightful balance to the meal.
Conclusion
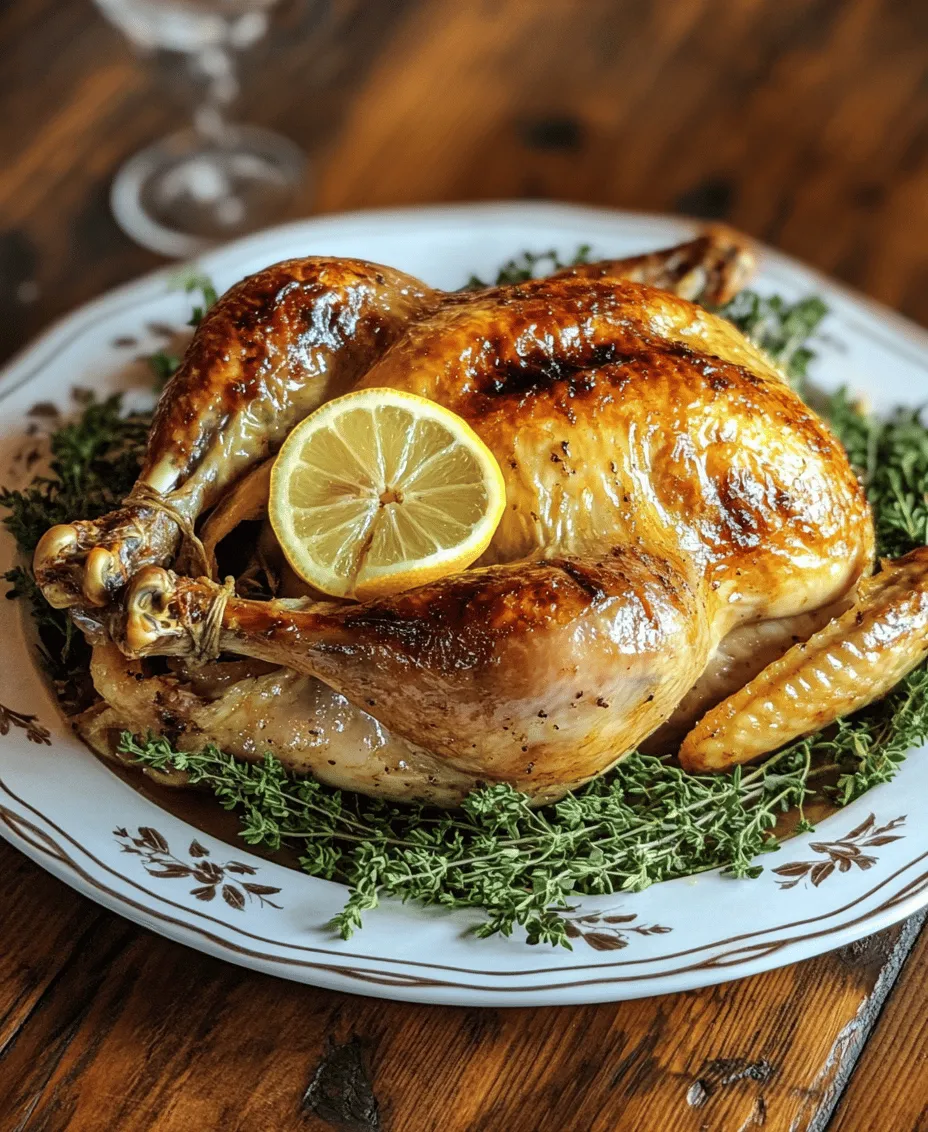
Cider Brined Roast Chicken is not just a meal; it’s an experience that brings warmth and flavor to your dining table. By understanding the brining process and the careful selection of ingredients, anyone can master this dish and impress their family and friends. With each bite, the sweet and savory flavors come together to create a memorable culinary experience that is sure to be a favorite for years to come.
Whether you’re preparing for a holiday feast or a simple family dinner, this recipe stands out as a testament to the joy of home-cooked meals. The combination of flavorful brine, perfect roasting techniques, and complementary sides creates a wonderful dining experience that is both satisfying and celebratory. Don’t hesitate to experiment with flavors and pairings to make this dish your own, and enjoy the delicious results at your next gathering.