Introduction to Delicious Oatmeal Rhubarb Bars
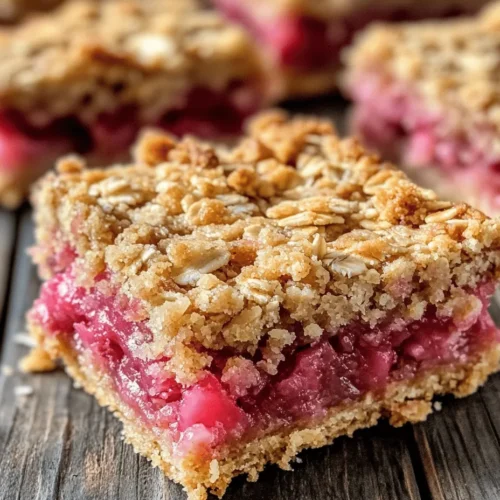
If you’re searching for a delightful dessert that beautifully marries the tartness of rhubarb with the wholesome goodness of oats, look no further than these Delicious Oatmeal Rhubarb Bars. This recipe offers a perfect blend of flavors and textures, creating a treat that is not only satisfying but also a feast for the senses. The crisp, chewy oat crust pairs wonderfully with the sweet and tangy rhubarb filling, making these bars a favorite among dessert lovers and a fantastic choice for any occasion, from family gatherings to coffee breaks.
Rhubarb, often known as the “pie plant,” shines in this recipe, bringing its unique tartness that contrasts beautifully with the sweetness of the brown sugar and the richness of the buttery oat base. Oatmeal, on the other hand, adds a hearty, comforting element to the dessert, making it ideal for any time of the year. Whether enjoyed warm out of the oven or chilled in the refrigerator, these oatmeal rhubarb bars are sure to impress.
The Benefits of Baking with Rhubarb
Rhubarb is not only a delicious ingredient but also a nutritious one. It is low in calories while being rich in vitamins and minerals. A single serving of rhubarb can provide a good source of Vitamin K, which is essential for bone health, as well as calcium, potassium, and fiber. This nutritional profile makes rhubarb an excellent choice for anyone looking to add a healthy twist to their baking.
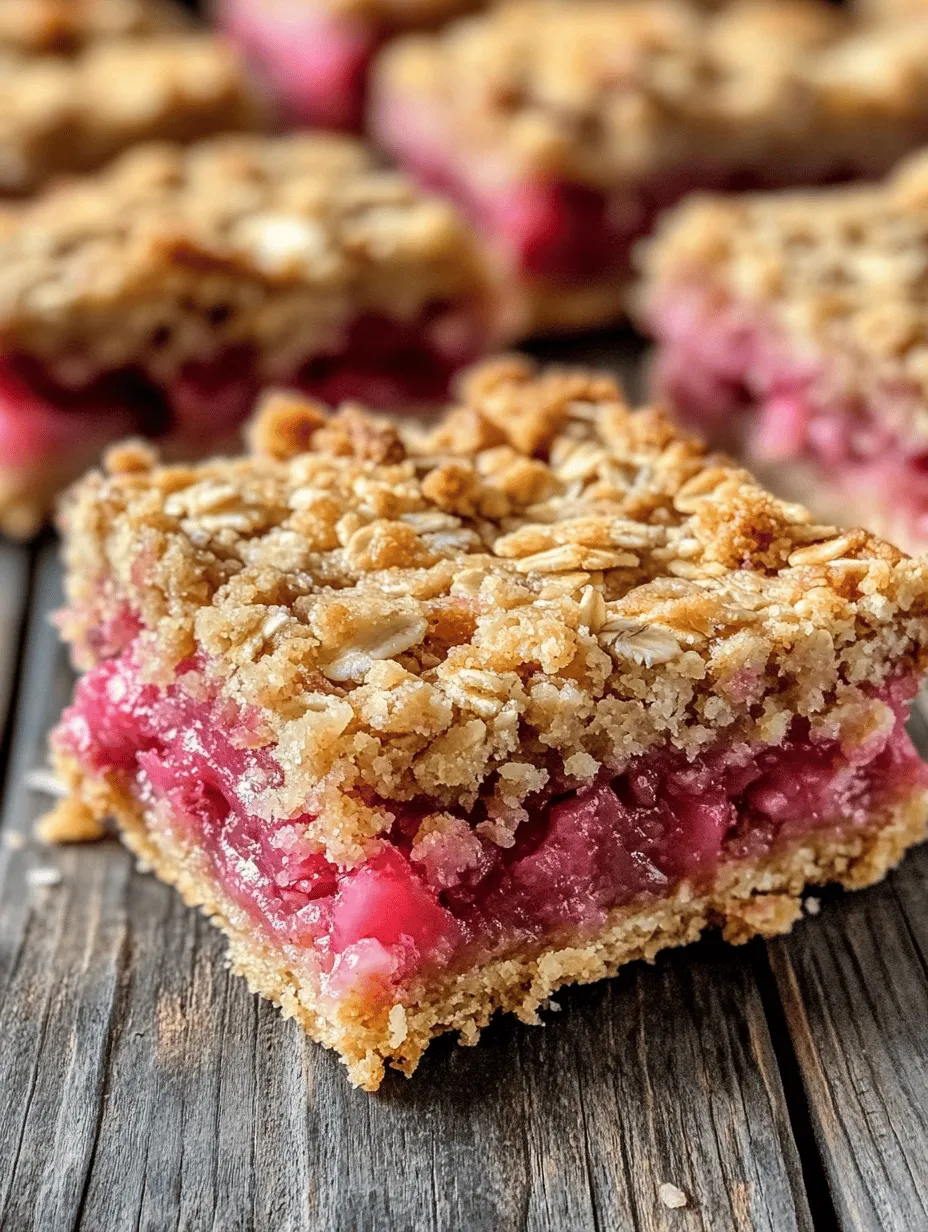
Moreover, rhubarb is a seasonal ingredient that typically peaks in spring and early summer. This short season makes it a sought-after fruit for many home bakers, encouraging them to utilize it in various desserts. Its bright pink stalks add a pop of color to any dish, making it visually appealing as well.
Another reason rhubarb is a beloved ingredient in dessert recipes is its flavor profile. The natural tartness of rhubarb complements sweetness exceptionally well, allowing it to enhance the overall taste of baked goods. When combined with sugars and other flavor enhancers like vanilla and lemon juice, rhubarb transforms into a delightful filling that perfectly balances the sweetness of the crust.
Understanding the Ingredients
Crust and Topping
The crust and topping of the oatmeal rhubarb bars are what truly make this dessert special. The key ingredient here is rolled oats, which provide a chewy texture and nutty flavor. Rolled oats are a staple in many baked goods, adding heartiness and helping to create a satisfying bite. They also contribute to the overall healthiness of the bars, making them a more nutritious choice compared to traditional desserts.
All-purpose flour plays an essential role in providing structure to the bars. It acts as a binding agent, ensuring that the oats and other ingredients stick together while still allowing for a crumbly texture. The combination of rolled oats and flour creates a solid foundation for the bars, allowing the filling to shine through.
Brown sugar is another crucial ingredient in this recipe, adding a rich, caramel-like flavor that enhances the overall taste. Unlike white sugar, brown sugar retains some of the molasses content, which not only contributes to its unique flavor but also helps to keep the bars moist. When baked, the sugar caramelizes slightly, providing a delightful sweetness that pairs perfectly with the tartness of the rhubarb.
Butter is a vital ingredient that impacts the texture of the bars significantly. It adds richness and flavor, creating a tender crumb that melts in your mouth. Using unsalted butter allows for better control over the overall saltiness of the dish, ensuring that the flavors of the other ingredients can shine through without being overwhelmed.
Lastly, salt and cinnamon are essential for enhancing the flavors of the oatmeal rhubarb bars. A pinch of salt helps to balance the sweetness and brings out the natural flavors of the ingredients. Cinnamon, with its warm and comforting aroma, adds depth to the overall flavor profile, making the bars even more enticing.
Rhubarb Filling
When it comes to the filling, the choice between fresh and frozen rhubarb can significantly influence the final result. Fresh rhubarb, when in season, is vibrant and packed with flavor. It has a crisp texture that holds up well during baking. On the other hand, frozen rhubarb is convenient and can be used year-round, but it may release more moisture during baking, which requires careful consideration in adjusting the recipe.
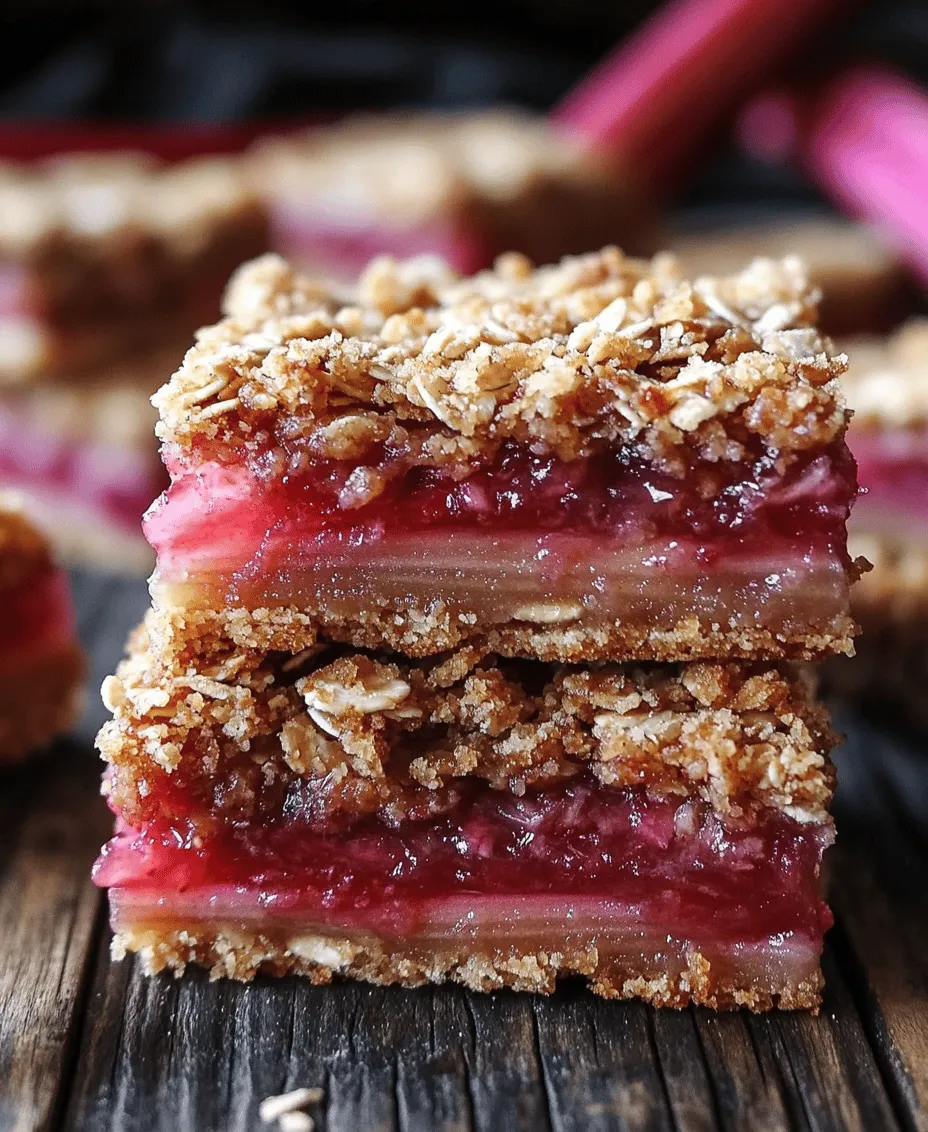
The science behind the use of sugar and cornstarch in the rhubarb filling is also essential to understand. Sugar not only sweetens the filling but also helps to draw out moisture from the rhubarb, creating a syrupy consistency. Cornstarch acts as a thickening agent, ensuring that the filling is not too runny and holds together well when cut into bars. Together, these ingredients create a luscious filling that complements the crust perfectly.
In addition to sugar and cornstarch, flavor enhancers like vanilla extract and lemon juice play a crucial role in creating a balanced filling. Vanilla extract adds warmth and depth, while lemon juice brightens the overall flavor profile, counteracting the tartness of the rhubarb and creating a harmonious blend.
Optional Glaze
An optional glaze can elevate the presentation and flavor of these oatmeal rhubarb bars. A simple glaze made from powdered sugar and milk can enhance the visual appeal, providing a glossy finish that makes the bars look even more enticing. Additionally, the glaze adds a touch of sweetness that complements the tart filling beautifully.
There are several variations for the glaze that you might consider. For those who prefer a dairy-free option, almond milk or coconut milk can be used as a substitute for regular milk. You can also experiment with flavored extracts, such as almond or maple, to add a unique twist to your glaze.
Step-by-Step Guide to Making Oatmeal Rhubarb Bars
Preparation Phase
Before diving into the recipe, it’s essential to prepare your kitchen and ensure you have everything you need. One of the first steps in making oatmeal rhubarb bars is preheating the oven. Preheating is crucial as it ensures that your bars bake evenly from the start. A well-preheated oven allows the batter to rise properly and helps achieve that perfect golden-brown crust. Aim to preheat your oven to 350°F (175°C), which is the ideal temperature for baking these bars.
Next, prepare your baking dish. You have two options: greasing the dish or using parchment paper. While greasing can work, lining the dish with parchment paper is often a better choice. Not only does it prevent sticking, but it also makes it easier to lift the bars out of the pan once they’re baked. If you choose to grease, be sure to use a generous amount of butter or cooking spray to ensure a smooth release. If you opt for parchment paper, cut it to fit the bottom of the dish and leave some overhang on the sides, which will help you lift the bars out once they’ve cooled.
With your oven preheated and your baking dish prepared, you’re now ready to gather your ingredients and start creating these delicious oatmeal rhubarb bars. The following steps will guide you through the entire process, ensuring that you achieve the perfect balance of flavors and textures in your baking endeavor. Stay tuned for the detailed instructions in the next section!
Making the Oatmeal Crust
To create a delicious base for your oatmeal rhubarb bars, start by preparing the oatmeal crust. This crust is essential for providing a sturdy yet tender foundation that will hold the sweet and tangy rhubarb filling. The key to achieving a crumbly texture lies in the mixing techniques you use.
1. Mixing Techniques for Achieving a Crumbly Texture: Combine your dry ingredients—rolled oats, flour, brown sugar, and baking powder—in a large mixing bowl. Using a fork or pastry cutter, blend in the cold butter until the mixture resembles coarse crumbs. This technique helps to incorporate air into the crust, resulting in a light and crumbly texture. Avoid overmixing, as this can lead to a tough crust.
2. Tips for Pressing the Crust Evenly: Once you have achieved the desired crumbly texture, transfer half of the mixture into a greased baking dish. Use your hands or the back of a measuring cup to press the mixture firmly and evenly into the bottom of the dish. Make sure to cover the entire base without leaving any gaps, as this will help the crust hold together during baking.
Creating the Rhubarb Filling
Now that your crust is prepared, it’s time to focus on the star of the show—the rhubarb filling. This filling should be vibrant, flavorful, and perfectly set beneath your oatmeal topping.
1. Ensuring the Rhubarb is Coated for Even Flavor Distribution: Begin by chopping your rhubarb into small, even pieces. In a separate bowl, mix the chopped rhubarb with sugar, cornstarch, and a splash of lemon juice. The sugar will help to draw out the juices from the rhubarb, while the cornstarch acts as a thickening agent. Toss the rhubarb until all pieces are evenly coated; this ensures that every bite of the filling is sweet and tart.
2. The Importance of Letting the Filling Sit Before Baking: After coating the rhubarb, allow the mixture to sit for about 10-15 minutes. This resting period is crucial as it allows the rhubarb to release some of its natural juices, which will enhance the flavor and texture of the filling during baking.
Assembling the Bars
With both the crust and filling ready, it’s time to assemble the bars. This process is straightforward but requires careful layering to achieve the best results.
1. Tips for Layering the Filling and Topping: Spread the rhubarb filling evenly over the pressed crust in the baking dish. Be gentle to avoid disturbing the crust. Next, take the reserved oat mixture and sprinkle it evenly over the rhubarb filling. Aim for an even distribution to ensure that each bar has a consistent topping.
2. Techniques for Even Distribution of the Topping: When layering the topping, consider using a spoon or your hands to break up any clumps in the oat mixture. This will help to create a more uniform layer. If desired, you can also gently pat down the topping to ensure it adheres to the filling underneath.
Baking Process
The baking process is where the magic truly happens, transforming your carefully assembled ingredients into a warm, comforting treat.
1. Time and Temperature: Achieving the Perfect Bake: Preheat your oven to 350°F (175°C). Bake the assembled bars for approximately 30-35 minutes or until the top is golden brown. The rhubarb should bubble slightly at the edges, indicating that it’s cooked through.
2. Signs That the Bars are Done: As the bars bake, keep an eye on the color. The top should turn a beautiful golden brown, and you should see bubbling rhubarb peeking through the oat topping. If the edges begin to brown too quickly, you can cover them with aluminum foil to prevent burning.
Cooling and Glazing
Once the bars are baked to perfection, it’s vital to allow them to cool properly before glazing.
1. Importance of Cooling Time for Texture: Allow the bars to cool in the baking dish for at least 20 minutes before attempting to cut them. This cooling time helps the filling set, making it easier to slice the bars into neat squares.
2. Techniques for Applying the Glaze Evenly: If you choose to add a glaze, mix powdered sugar with a bit of milk or lemon juice until you achieve your desired consistency. Drizzle the glaze over the cooled bars using a spoon or a piping bag for a more controlled application. This step adds an extra layer of sweetness and an appealing finish.
Serving Suggestions and Pairings
When it comes to enjoying your oatmeal rhubarb bars, there are numerous ways to serve and enhance their delightful flavors.
1. Ideas for Serving: These bars are perfect as an afternoon snack or dessert. Pair them with a cup of tea or coffee for a delightful pick-me-up. They can also be served warm with a scoop of vanilla ice cream for a comforting dessert option.
2. Garnishing Options: Enhance your presentation by garnishing the bars with fresh fruits like raspberries or strawberries. A dollop of whipped cream or a scoop of ice cream can elevate the experience, making it even more indulgent.
3. Perfect Occasions for Enjoying Oatmeal Rhubarb Bars: These bars are ideal for various occasions, from seasonal gatherings and picnics to casual get-togethers with friends. Their unique flavors make them a standout treat during spring and summer when rhubarb is in season.
Storage and Shelf Life
To keep your oatmeal rhubarb bars fresh and delicious, proper storage is key.
1. Best Practices for Storing Bars to Maintain Freshness: Store the cooled bars in an airtight container at room temperature for up to three days. For longer shelf life, consider refrigerating them, where they can last for up to a week.
2. Freezing Options for Longer Shelf Life: If you want to enjoy these bars later, freeze them in a single layer on a baking sheet. Once frozen, transfer them to an airtight freezer bag. They can be stored in the freezer for up to three months. When you’re ready to enjoy them, simply thaw at room temperature or reheat them in the oven.
3. Reheating Tips for Enjoying Leftovers: To refresh leftover bars, reheat them in a preheated oven at 350°F (175°C) for about 10-15 minutes. This will help restore some of that freshly baked texture, making them taste almost as good as new.
Conclusion: The Delight of Homemade Oatmeal Rhubarb Bars
In summary, homemade oatmeal rhubarb bars offer a delightful combination of flavors and textures that are sure to please everyone. The sweet and tart rhubarb filling pairs beautifully with the crumbly oatmeal crust, creating a treat that’s both satisfying and comforting.
Baking these bars is not only a delicious endeavor but also a joyful experience that you can share with loved ones. Whether you’re enjoying them warm with ice cream or serving them at a gathering, these bars are sure to be a hit.
Don’t hesitate to experiment with seasonal ingredients in your baking. The beauty of homemade treats lies in their versatility, allowing you to adapt recipes to suit your taste and the time of year. Enjoy the process, savor the results, and share the love of baking with those around you!